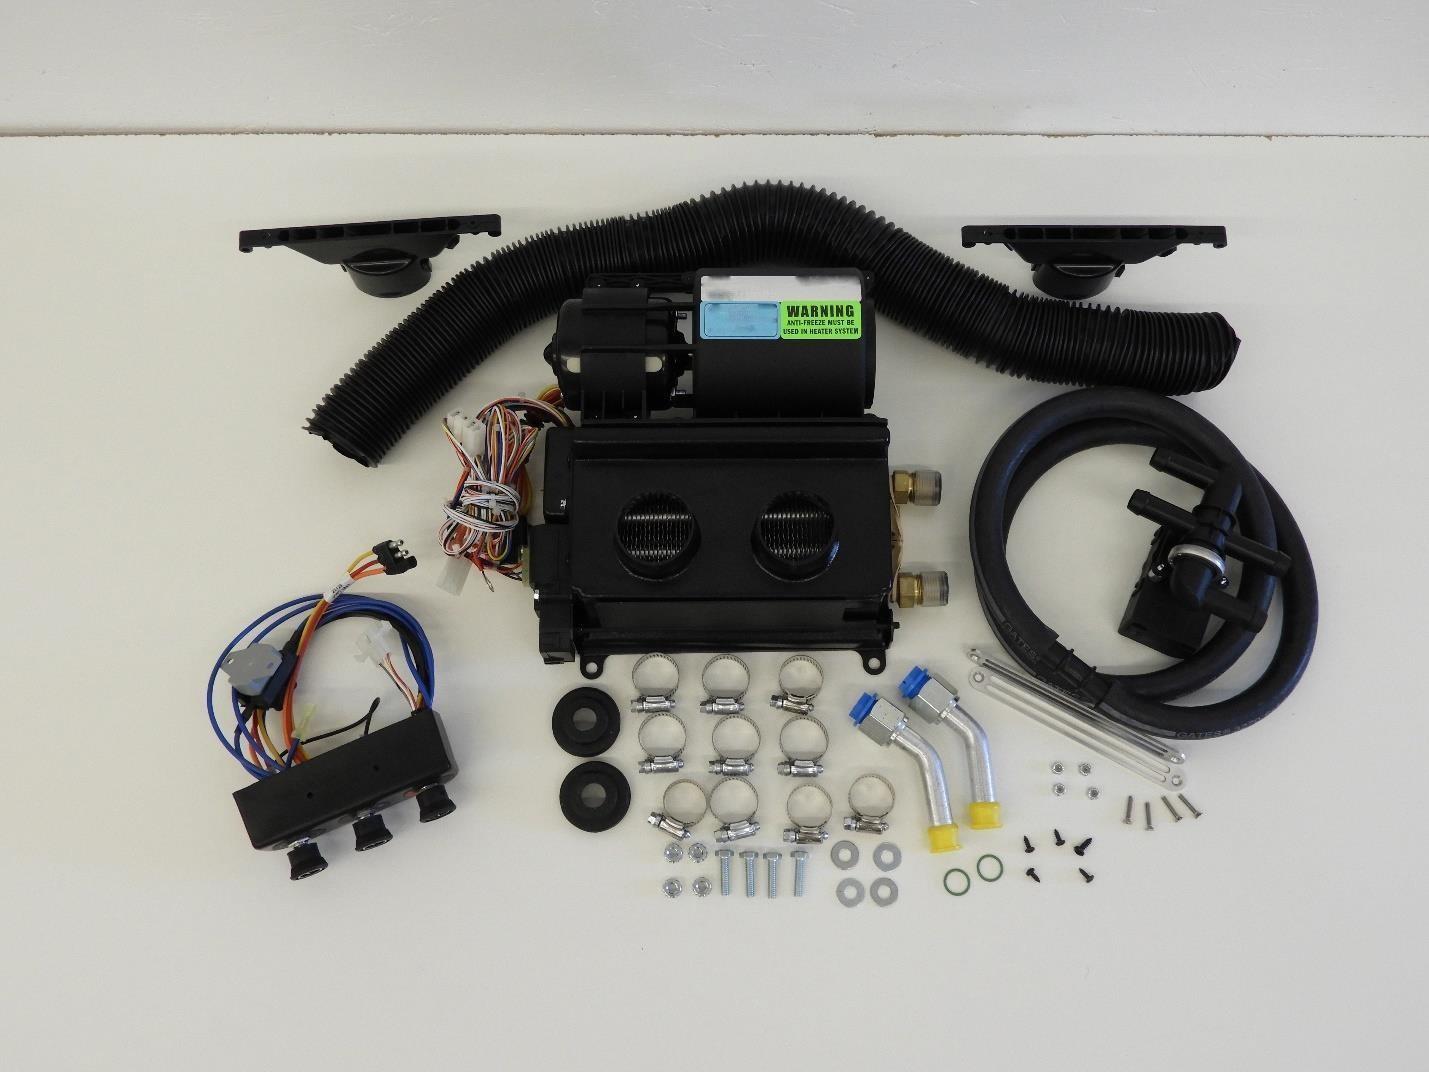
Position heater box assembly as shown onto the masked off portion of the firewall and mark the mounting holes. Methods of mounting the heater box unit is up to the installer’s discretion. For easy installation purposes, we have used self-tapping screws. The recommended method is to use nutsert. Predrill the marked holes for whichever method is preferred. Remove the masking tape. Mount the unit as shown below.
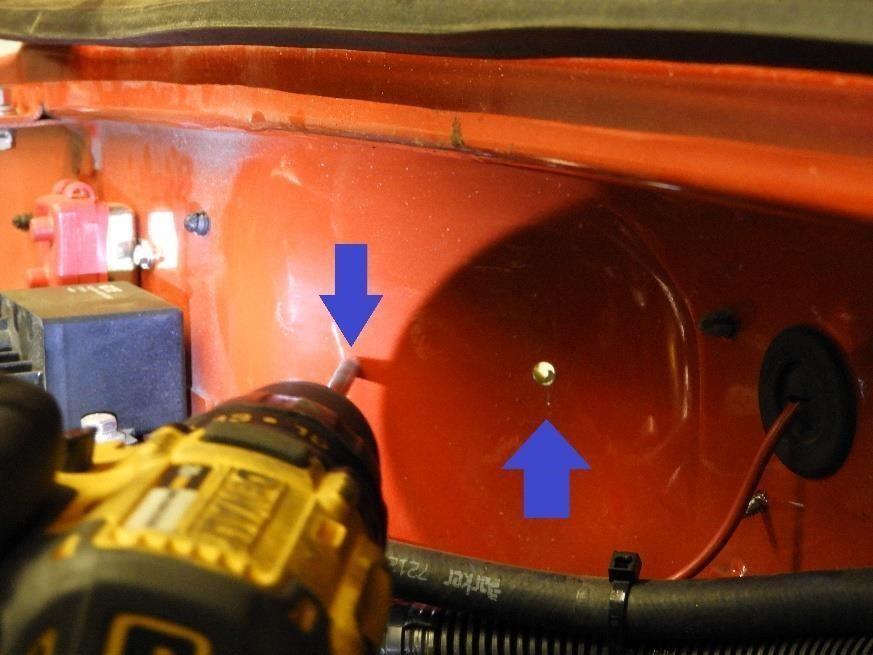
BEFORE DRILLING HOLES INTO FIREWALL, BE CAREFUL OF EXISTING WIRING HARNESS ON THE INSIDE OF THE FIREWALL
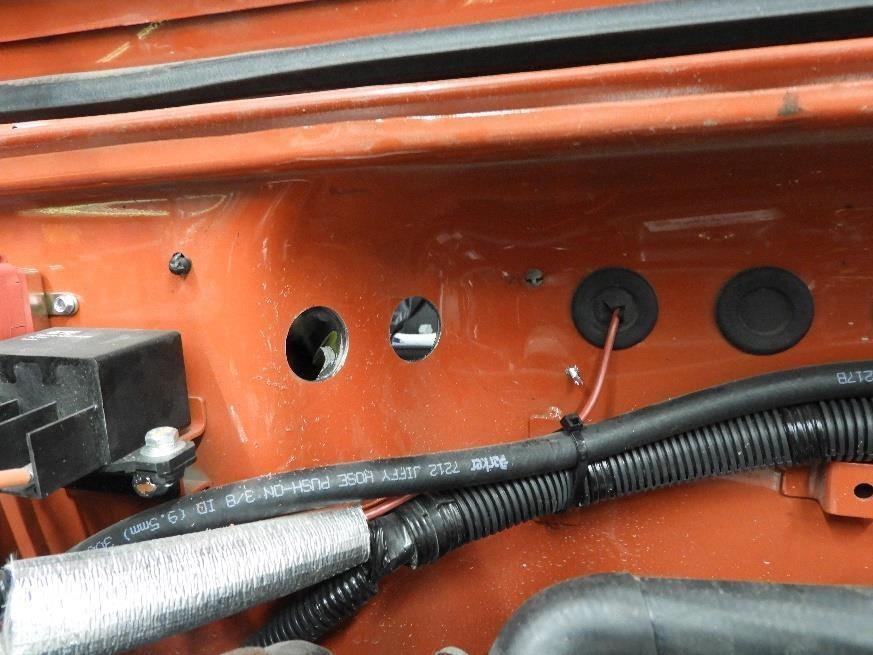
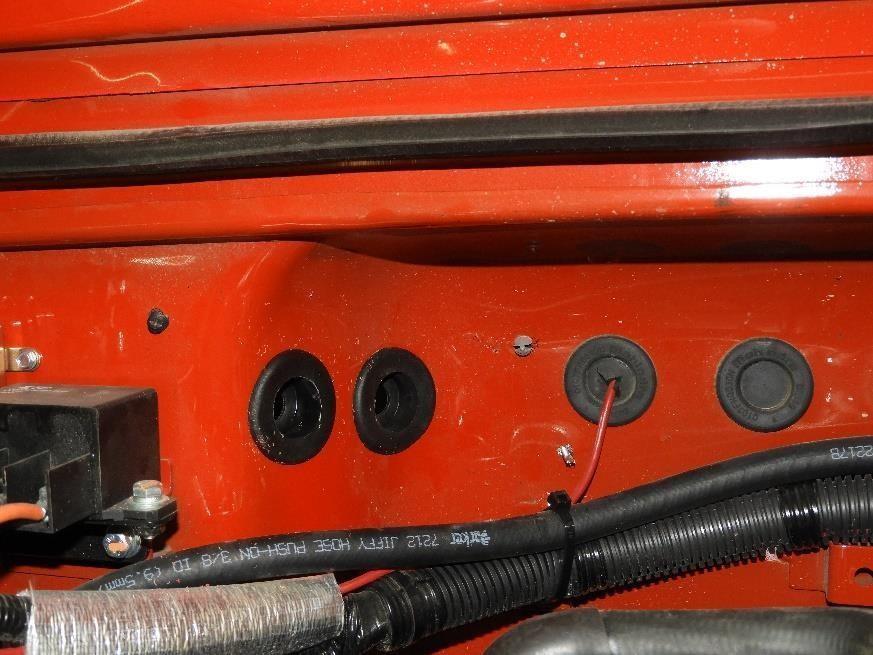
Predrill two ¼” holes 2 ½” apart in line with the four factory holes. Drill these holes to 1 ¼” using a step bit or a hole saw. Make sure to clean up the edges after the holes have been drilled. You can now install the supplied grommets.
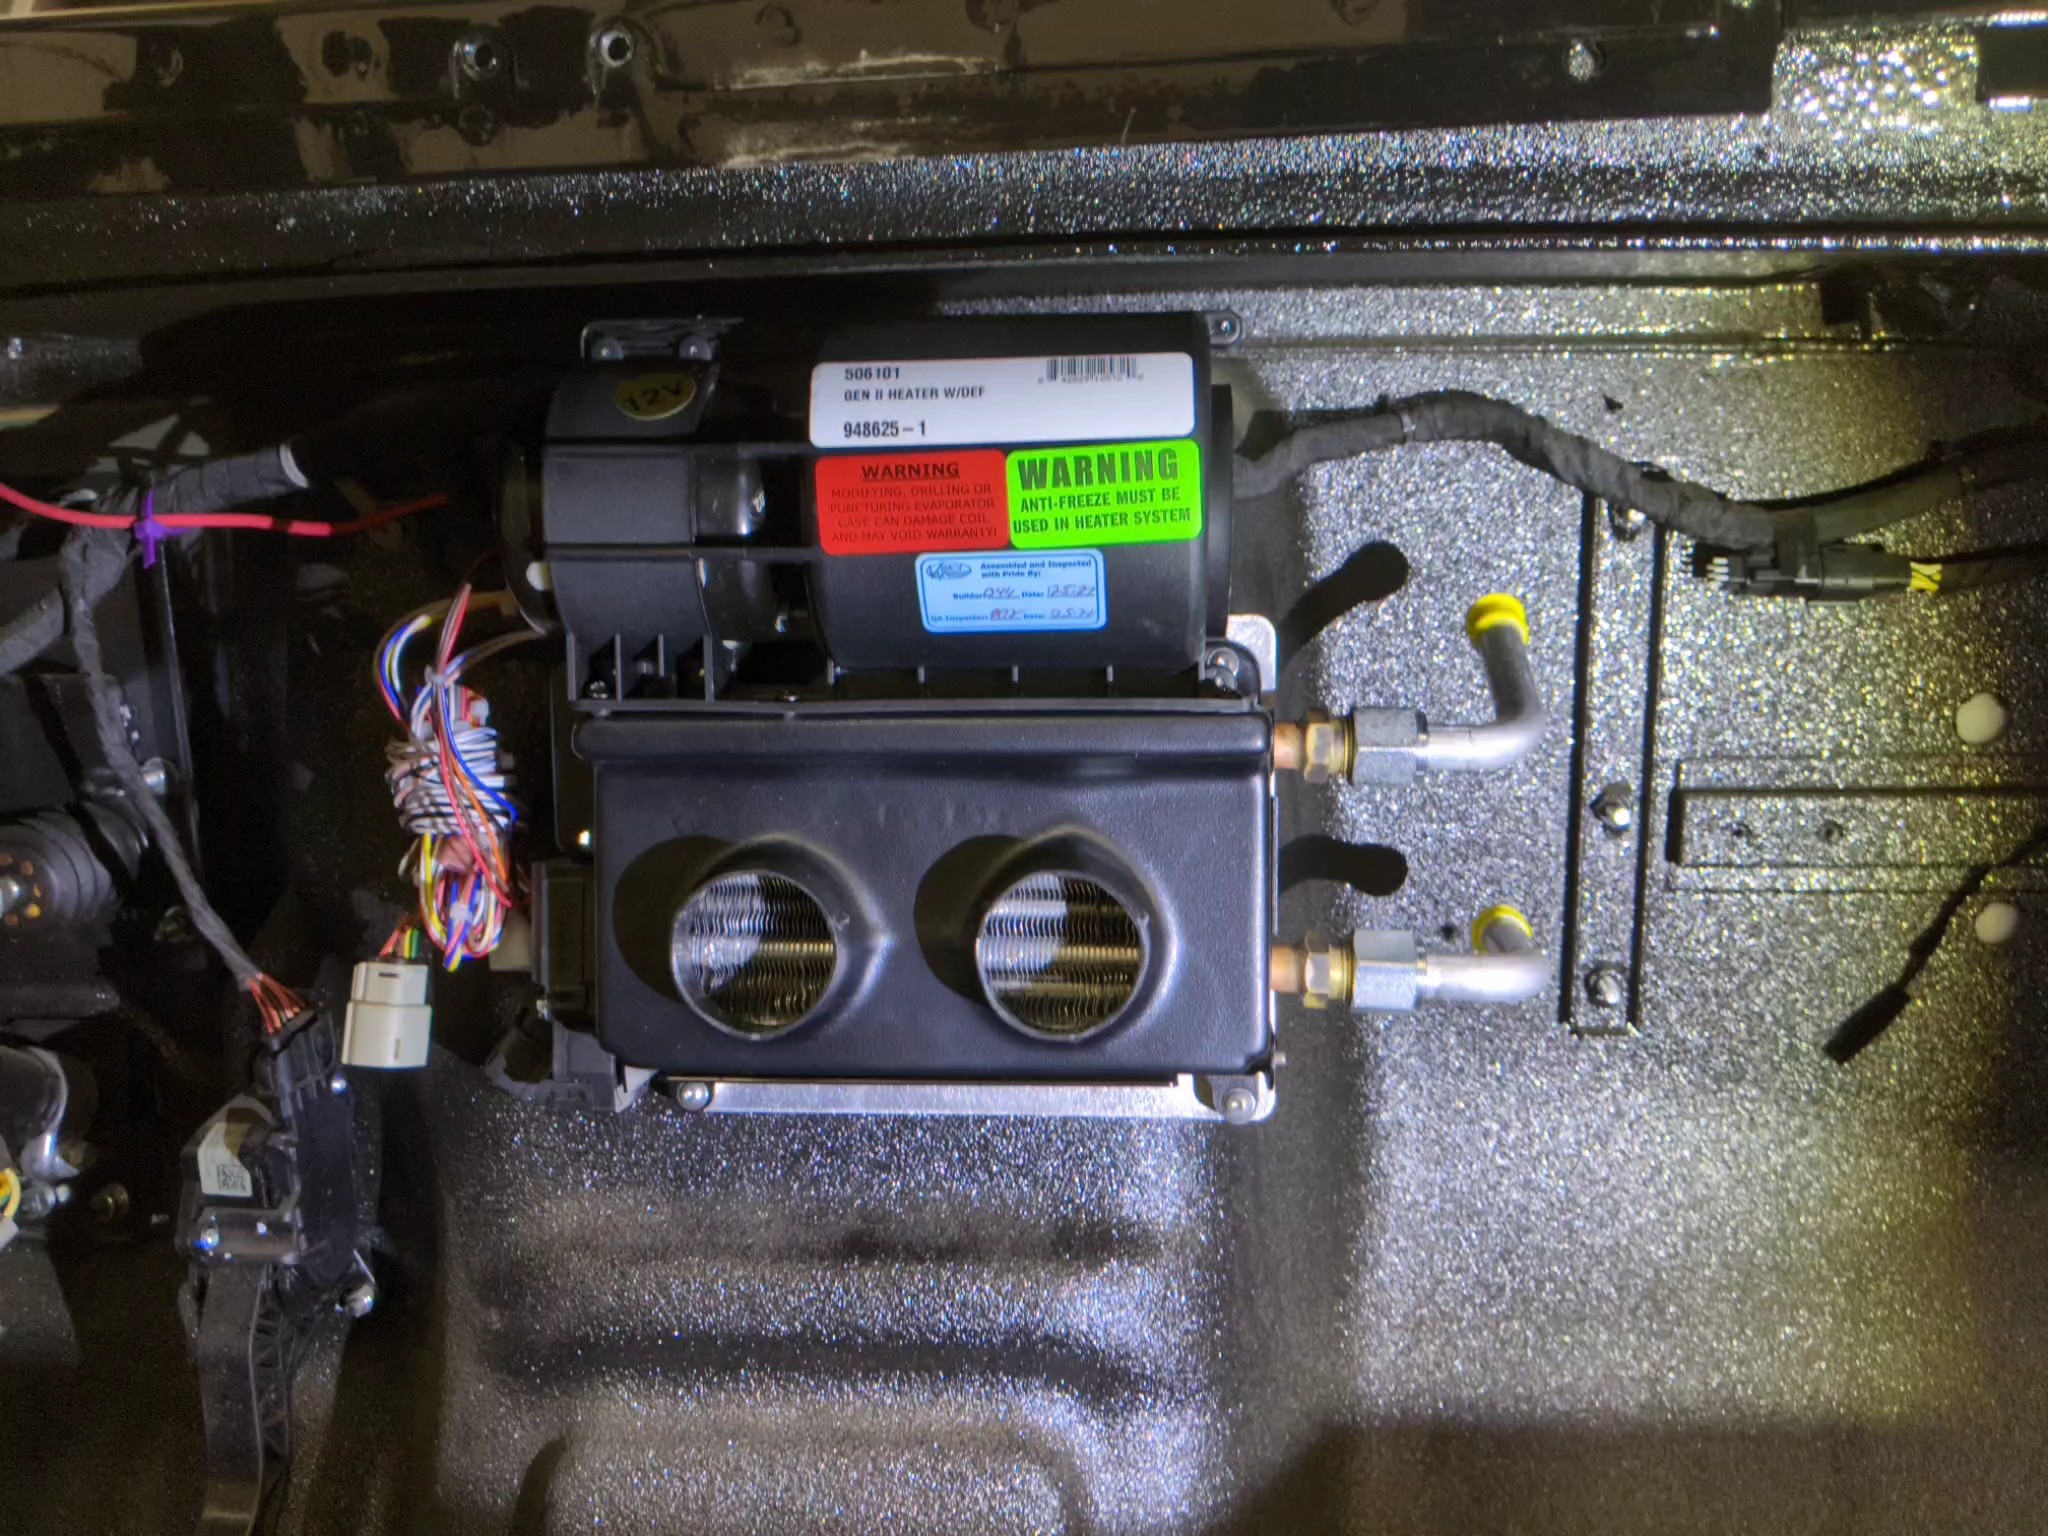
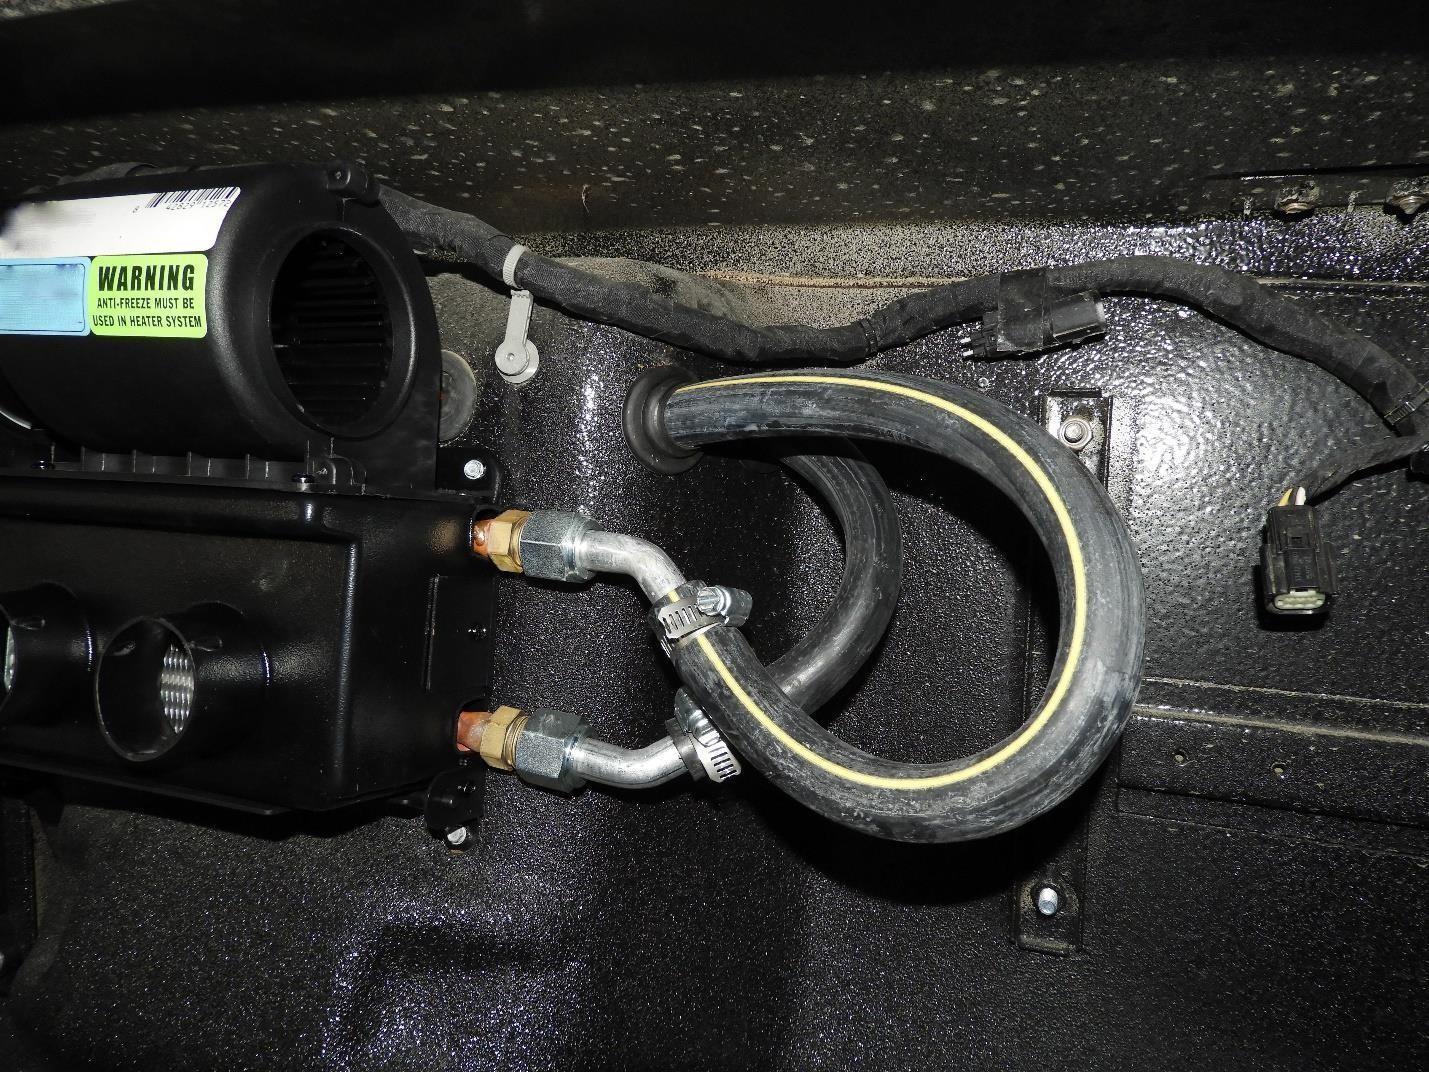
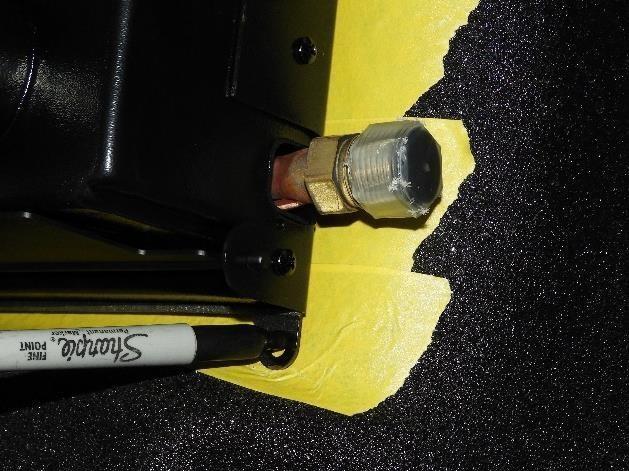
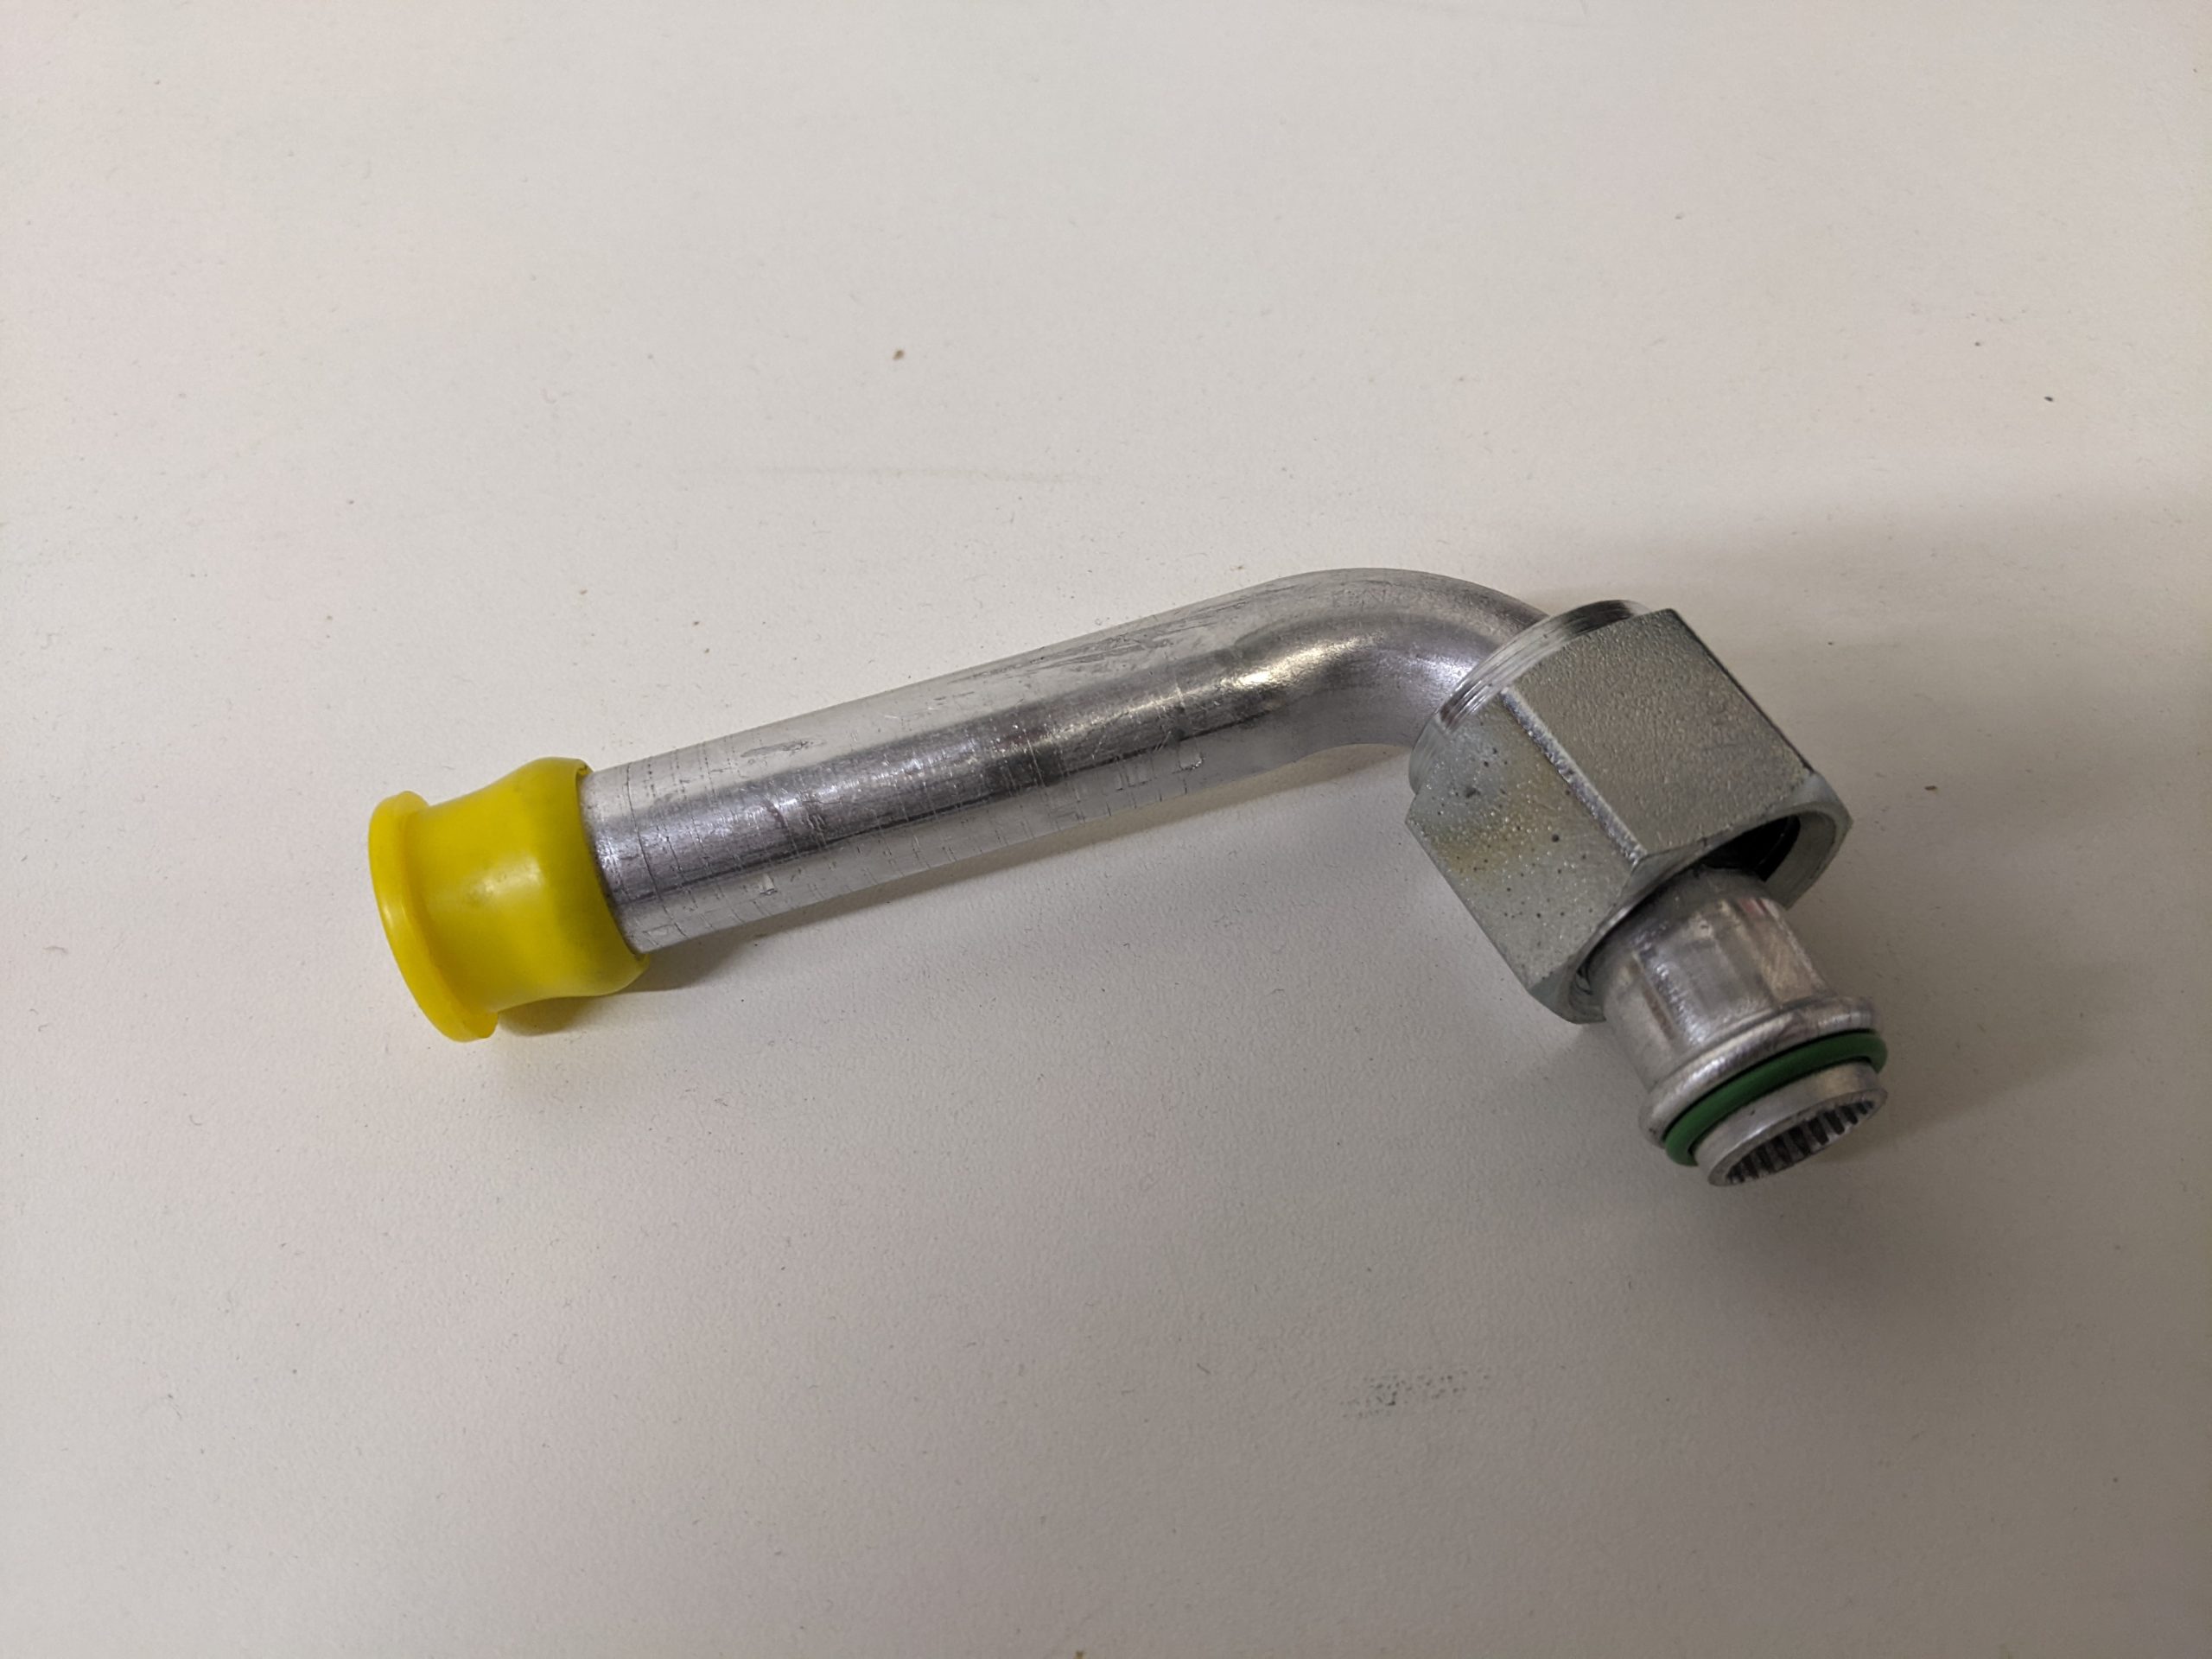
Remove the end caps from the heater unit and install the supplied 45-degree fittings onto the box as shown. (Make sure the O-rings are on the 90- degree fittings.)
Run each end of the supplied heater hose through the grommets into the firewall. Slide the hose onto the 45-degree fittings and secure them with hose clamps as shown in the picture above.
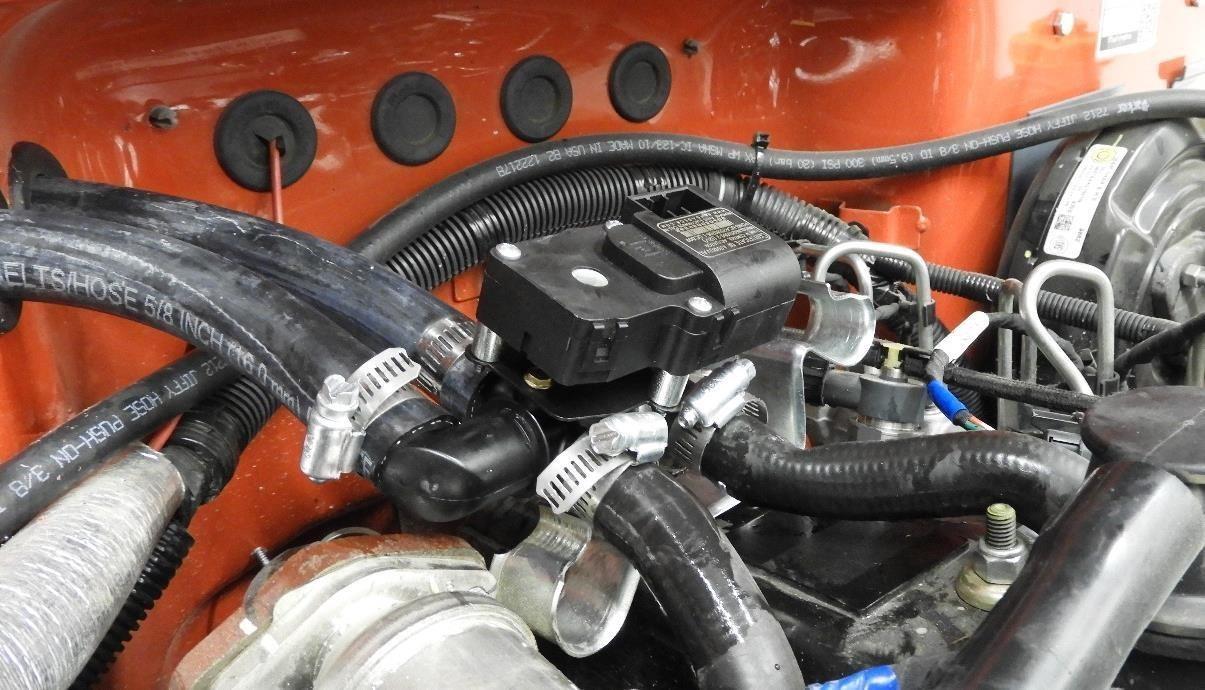
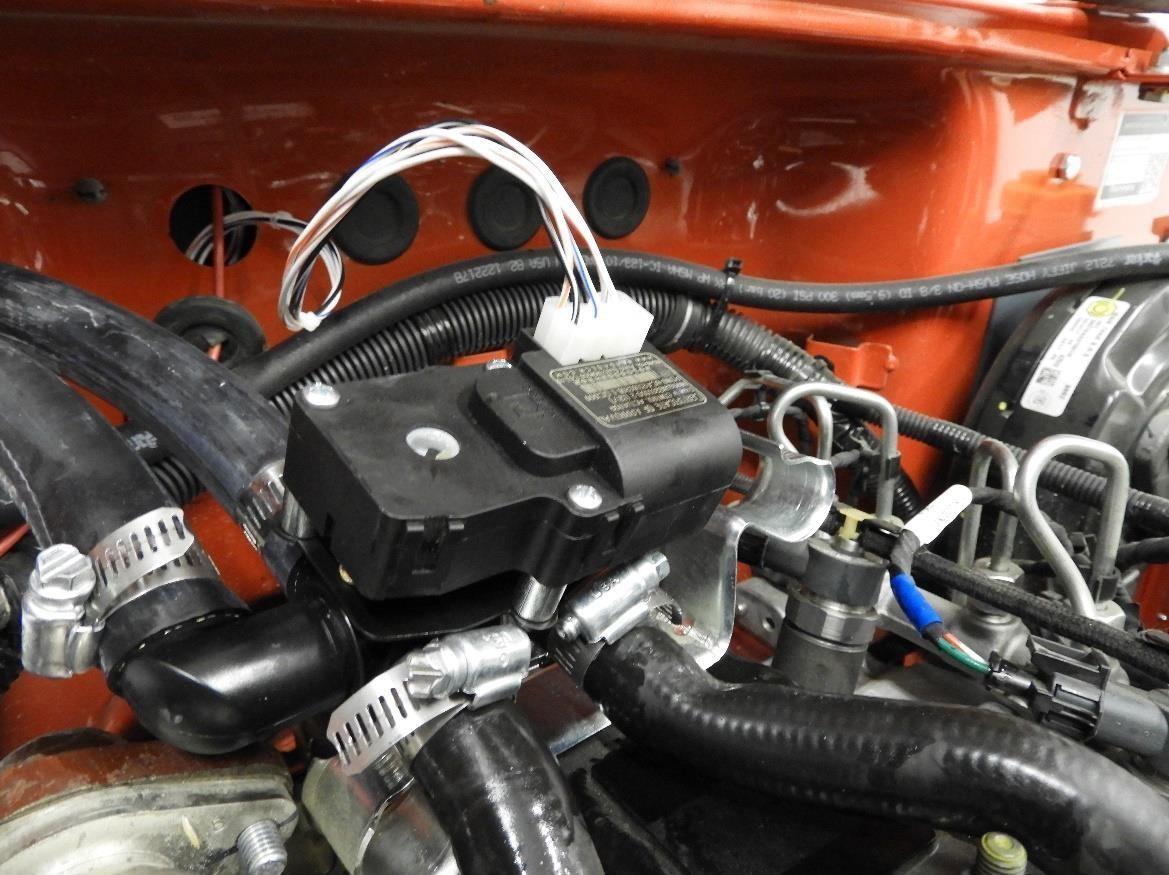
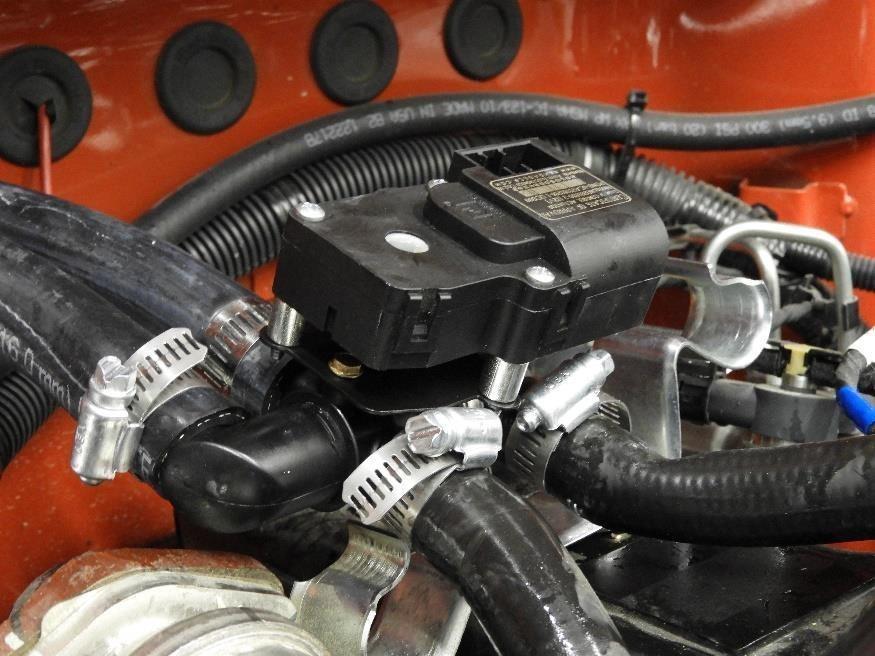
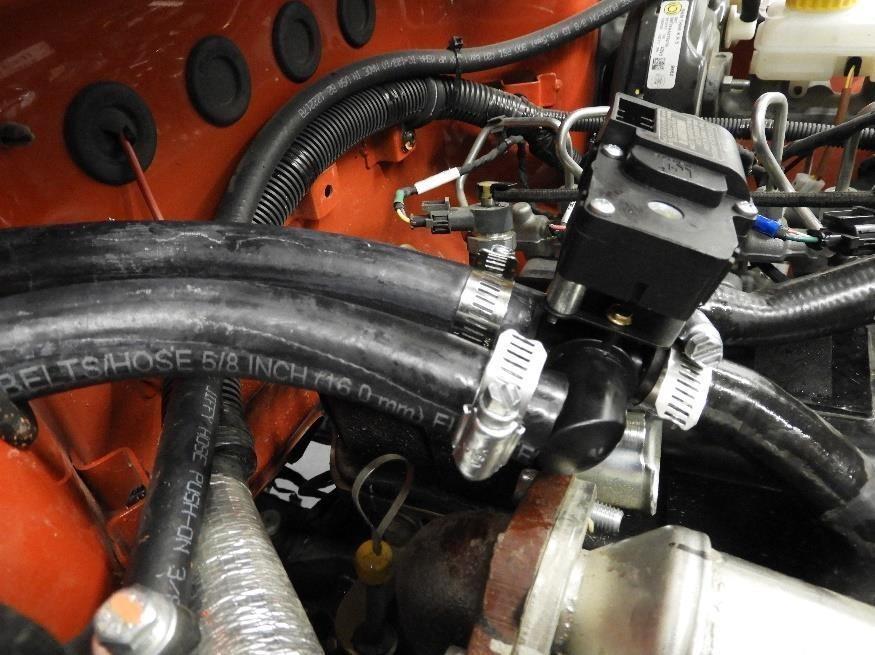
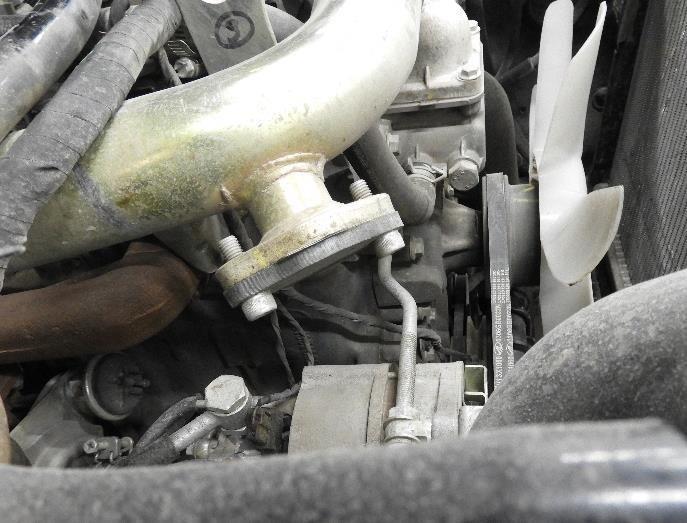
If you are keeping the EGR system hooked up, cut and install the engine coolant lines onto the supplied 4-way valve as shown in the picture below. You will end up removing a section of the hose. Remove the tin coolant line bracket on top of the valve cover.
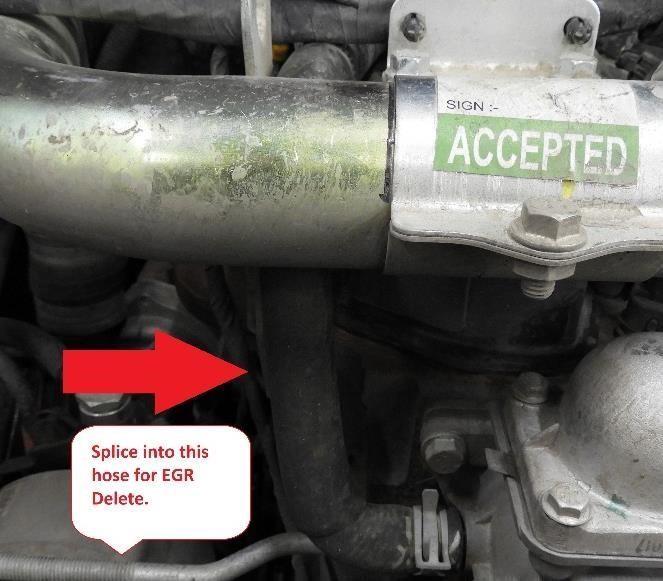
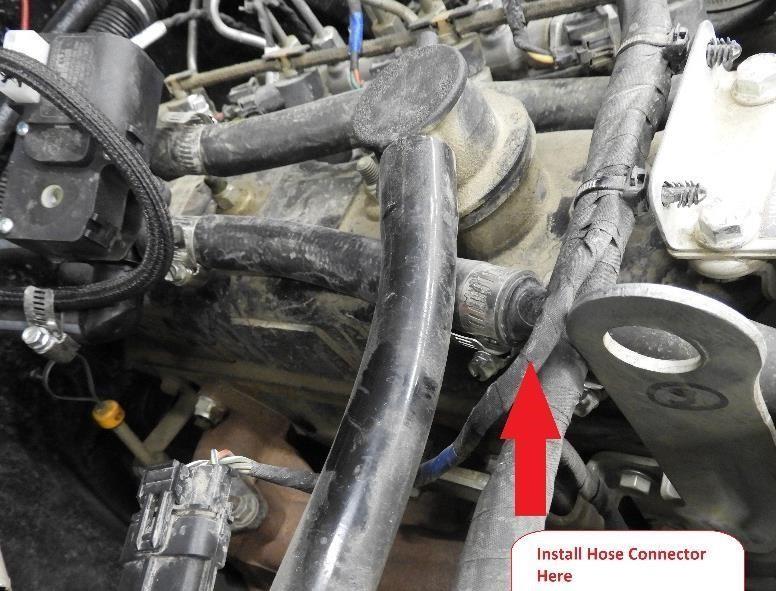
If the EGR has been removed, splice into the hose that runs from the thermostat to the EGR cooler with our supplied hose barb and a strait section of heater hose running to the 4-way valve.
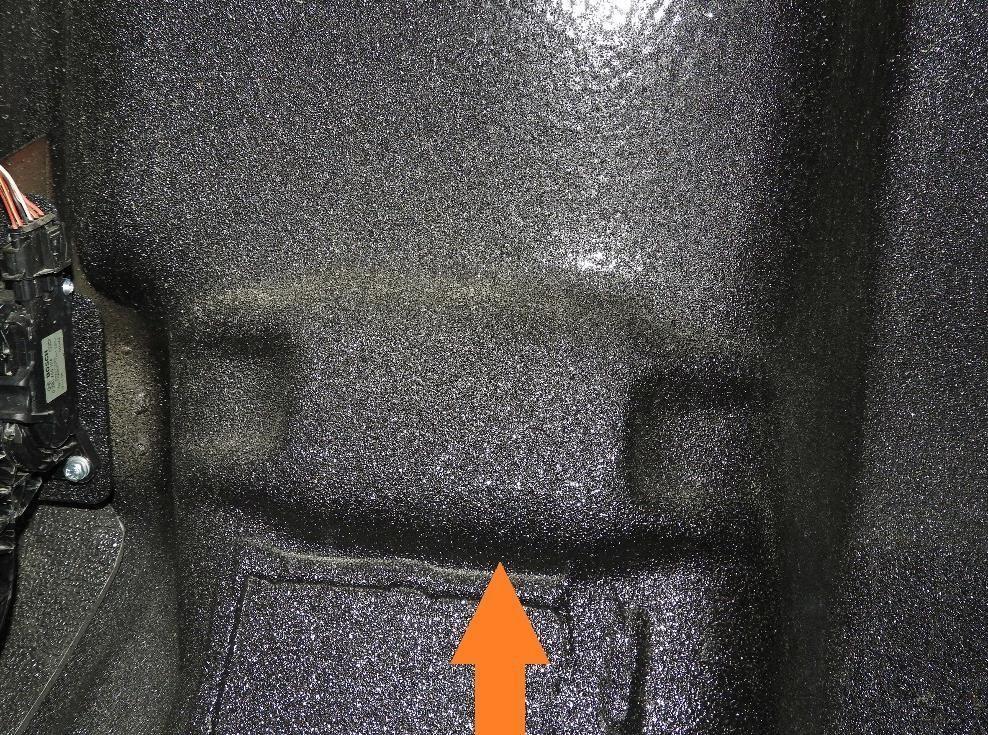
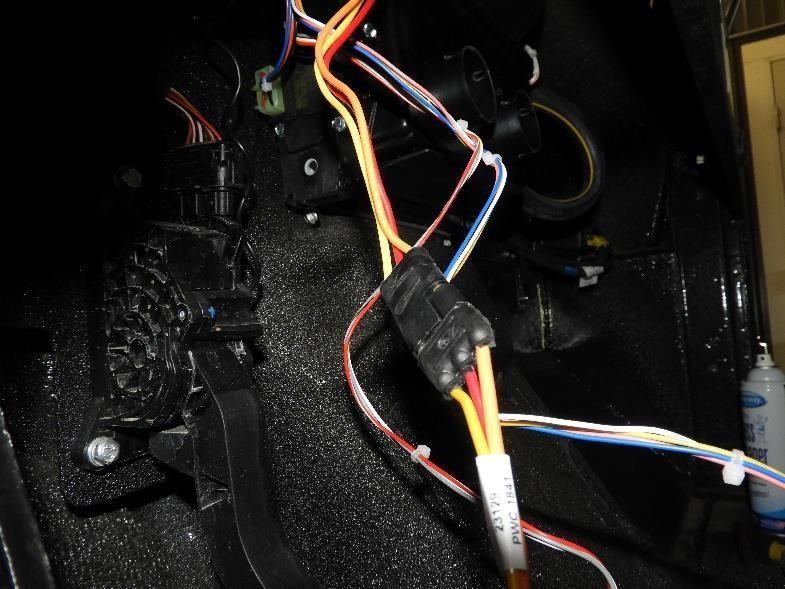
Unwrap the heater box wiring bundle. Run the heater valve control wiring harness over the top of the heater towards the passenger side. Run the plug and wires through one of the factory firewall grommets as pictured. Then plug the harness into the heater valve. Secure wiring with zip ties.
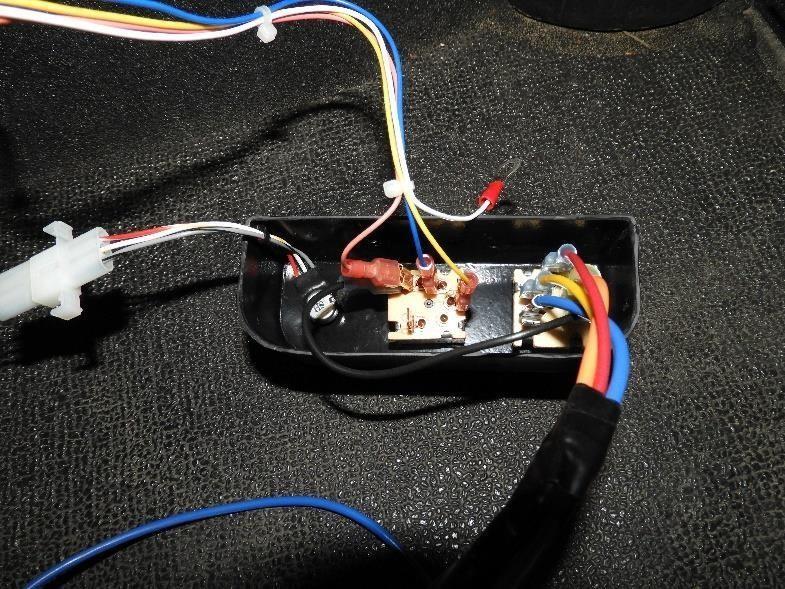
Use the wiring schematic below to complete the wiring of heater box to power, ground, and the control panel. (Use our On the Rox Auxiliary Fuse panel for easy installation!)
Once the wiring is completed, attach the control panel to the bottom of the dash. You can also install the control knobs into the dash.
Install defrost vents
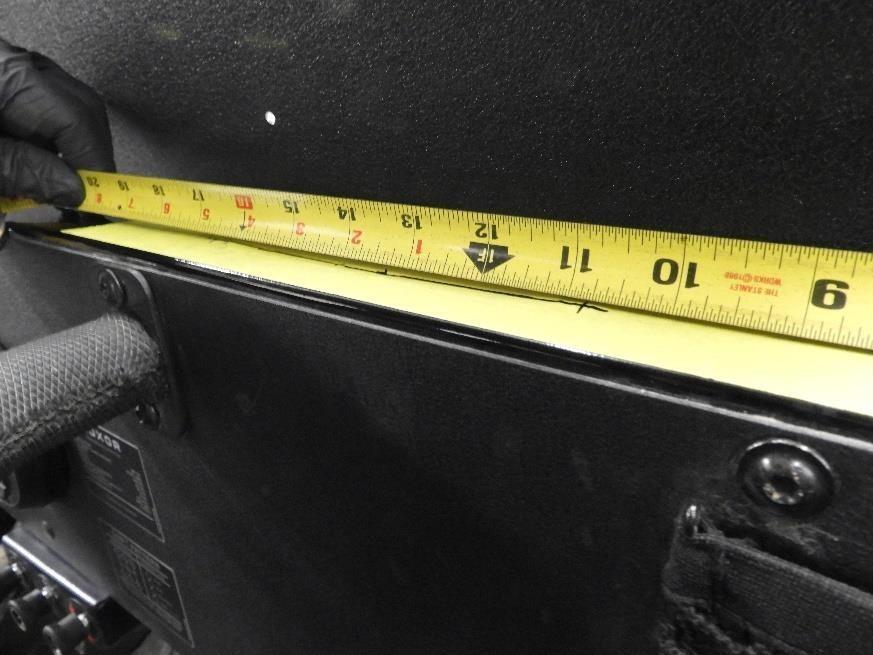
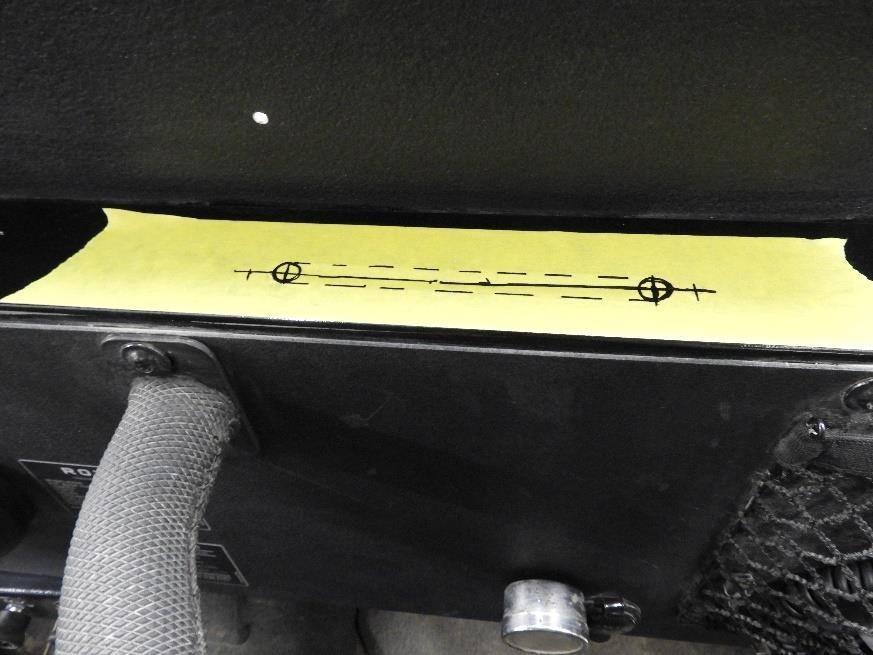
Mask off the top of the dash. Center all measurements front to back.
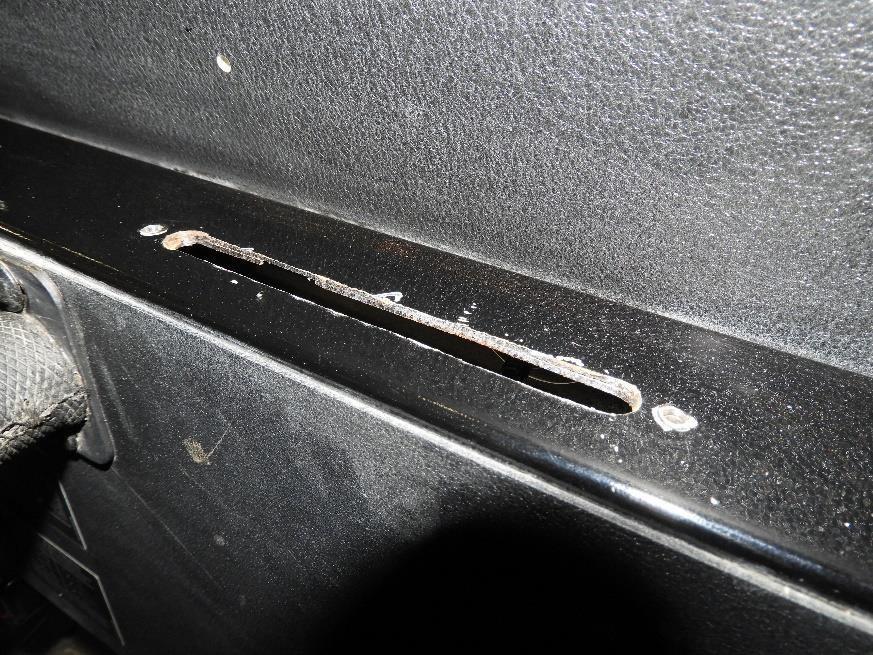
Drill 1/8” holes for the vent bezel screws at 10 ¾” and 16 ½” on both sides. Drill two 3/8” holes at 11 ¼” and 16”. Cut out the section between the two 3/8” holes.
Install the defrost vents and the aluminum dash bezels with the mounting screws.
Connect the ducting between the heater box and the defrost vents.
Make sure all electrical connections are clean, safe and tied up out of the way with zip ties. Check for any coolant leaks after installation. Topping off the coolant tank level will be necessary after the installation.
*On the Rox Fabrication assumes no liability for the installation of the heater kit. These instructions are meant as a guide, the user assumes any liabilities associated with this kit.


