This kit is designed for, and compatible with our Standard Windshield Frame and our Folding Windshield Frame.
Note: This kit does not work with any Mahindra windshield frame.
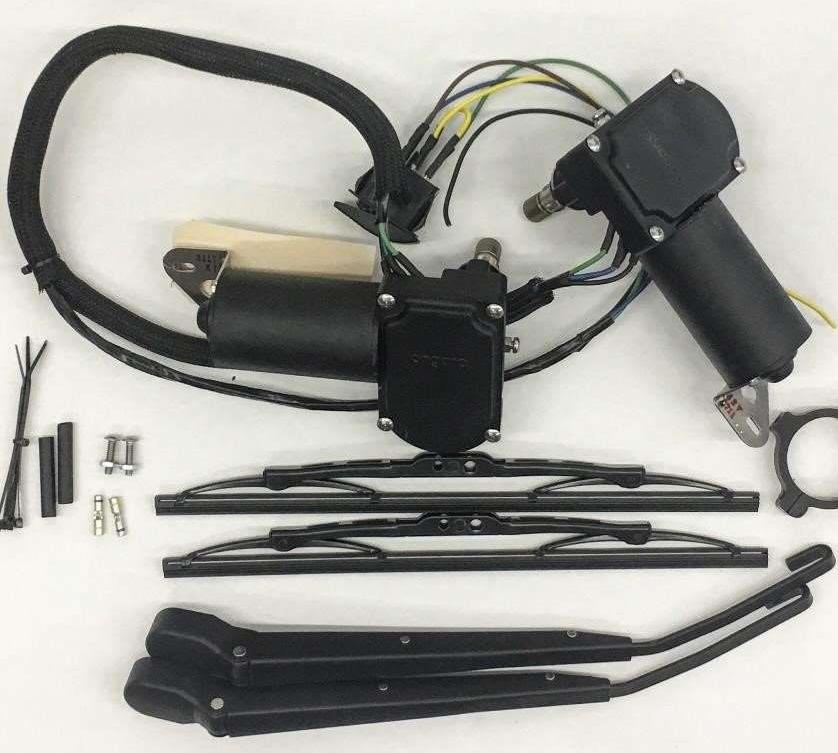
Contents:
(1) Wiper motors and Wiring Harness
(2) Windshield Wiper Arms
(2) Windshield Wipers
(2) Windshield Wiper Clip Kits
(2) #10 Stainless Steel Button Head Bolts
(2) Nuts
(2) 14-16/10-12 Butt Connectors
(2) Lengths Shrink Tubing
Zip Ties
*READ INSTRUCTIONS THOROUGHLY BEFORE BEGINNING. OTR IS NOT RESPONSIBLE FOR INCORRECT INSTALLATION OR LOCAL LAWS REGARDING AFTERMARKET ACCESSORIES. THE USER IS RESPONSIBLE FOR ALL LIABILITIES ASSOCIATED WITH THE INSTALLATION AND USE OF THIS PRODUCT.
ALWAYS UTILIZE PERSONAL SAFETY EQUIPMENT WHEN YOU ARE WORKING IN THE SHOP.
Verify all included parts are there.
Drill out the hole on the top of the dash closest to the gauge cluster to 7/16” Note: this hole will be at an angle if your windshield frame has previously been installed. Drill this hole prior to windshield frame installation if possible
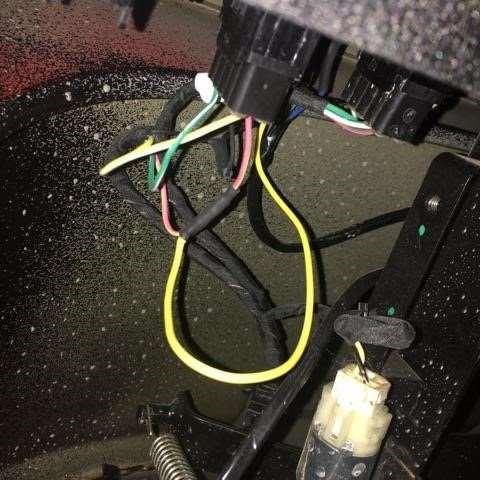
Unplug the wiring harness from the switch, so that the wires can be routed through the enlarged hole. After routing the wires and loom inside the dash, snap the plastic grommet into place.
Route the wires over top of the steering column and brake pedal assembly brackets. Secure with zip ties to a safe location, where it will not get pinched between moving parts.
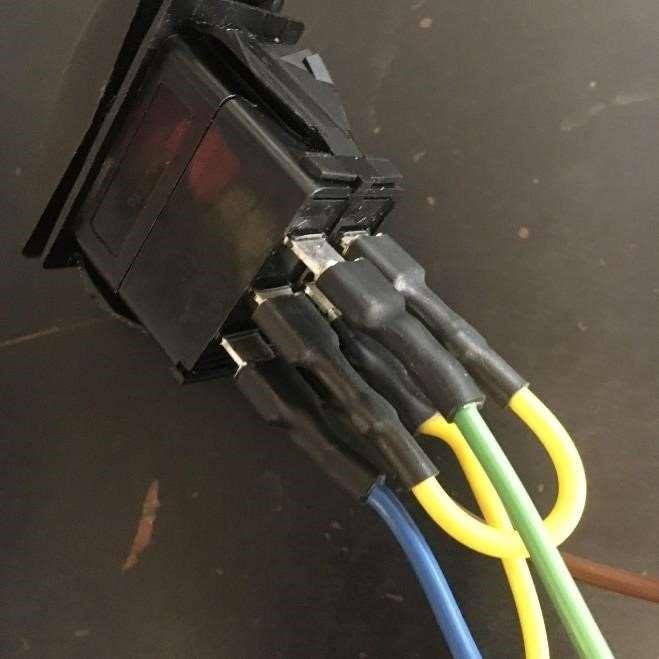
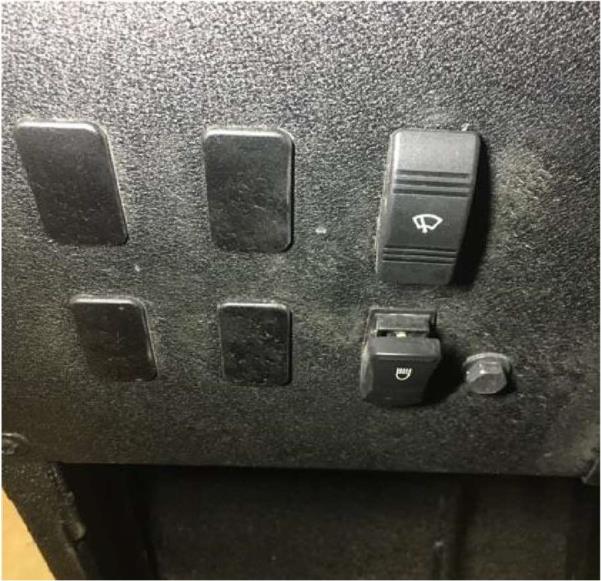
Remove the dash switch blank where you want your wiper switch to be. Run the wires through that hole, and reattach them to the wiper switch.
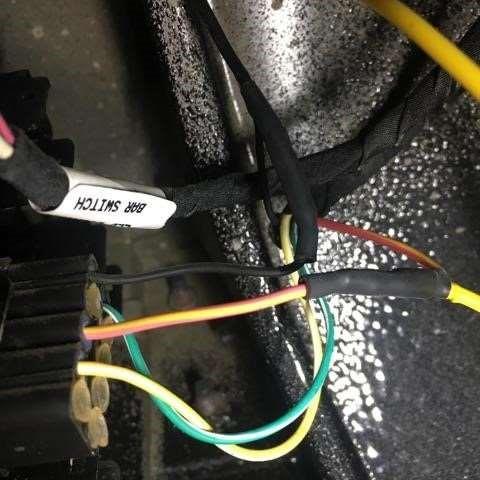
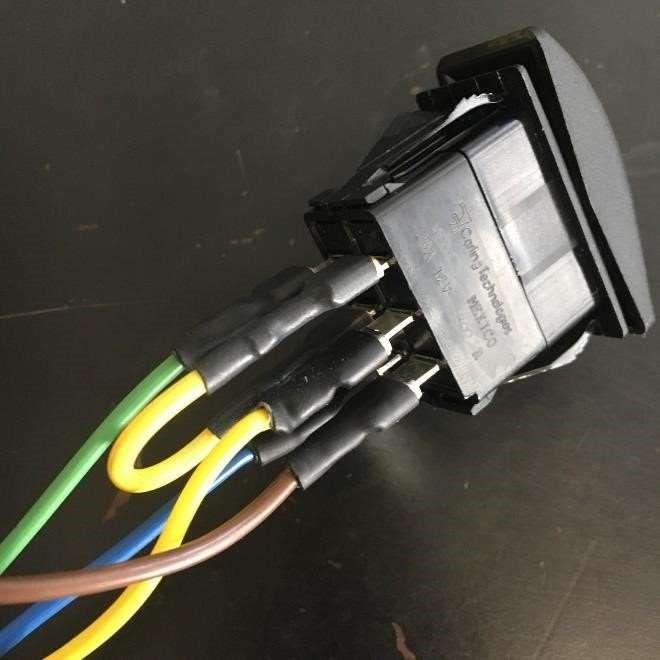
For Reference: #1-Green #2- Yellow Jumped to #4 #3-Blue #5-Yellow #6-Brown
If you are not using our On the Rox Auxiliary Fuse Panel, wire your harness as follows:
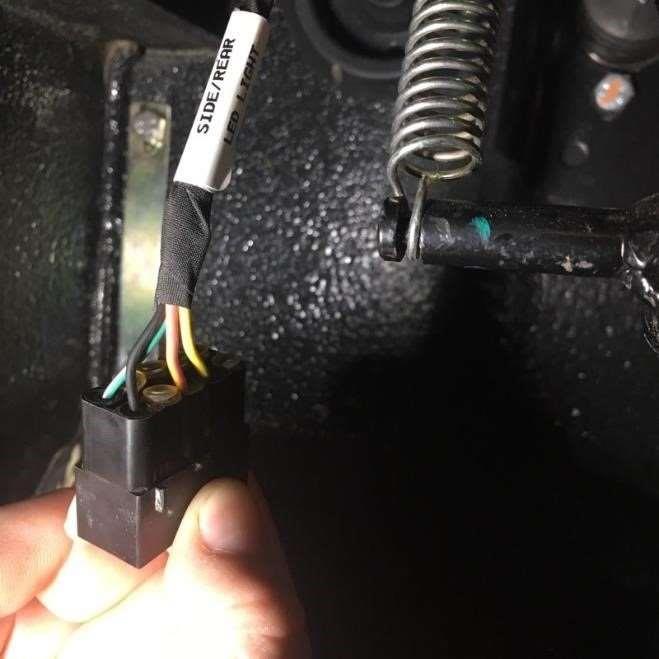
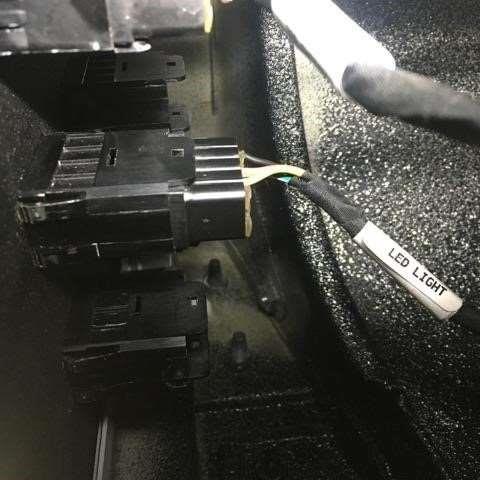
The switch panel on the dash comes with two extra connectors. They are labeled “Side/Rear LED Light” and “LED Light Bar Switch.” Use the connector labeled LED Light Bar Switch for the following instructions
Snap the switch into place.
Note: these are very difficult to remove once they are installed.
Peel back factory wire loom from the wires going into the connector.
Cut the pink with yellow tracer wire, and the black wire about 2” back from the connector.
Using the supplied butt connectors and shrink tubing, splice the yellow wire from the On the Rox wiring harness into the Roxor’s pink with yellow tracer wire, and crimp the connection. (Remember to install the shrink tubing before crimping both sides of the connection.)
Use the same method to splice the black wire from the On the Rox wiring harness into the Roxor’s black wire going into the plug.
Shrink the tubing around the connection using a heat gun. Zip tie and re-wrap any wires that have slack in them.
Reinstall the connector to the switch blank.
Verify that the wiper motors operate and set them to the park position.
Install wiper arms and windshield wipers using the clip kits
Note: it is important to test motor operation before installation of wiper arms to ensure proper arm placement.


