*READ INSTRUCTIONS THOROUGHLY BEFORE BEGINNING. OTR IS NOT RESPONSIBLE FOR INCORRECT INSTALLATION OR LOCAL LAWS REGARDING AFTERMARKET ACCESSORIES. THE USER IS RESPONSIBLE FOR ALL LIABILITIES ASSOCIATED WITH THE INSTALLATION AND USE OF THIS PRODUCT.
ALWAYS UTILIZE PERSONAL SAFETY EQUIPMENT WHEN YOU ARE WORKING IN THE SHOP.
DISCONNECT BATTERY BEFORE YOU BEGIN.
Materials needed:
15 mm socket or wrench
10 mm socket or wrench
1⁄2 socket or wrench
3/16” allen wrench
5/32” allen wrench
1/8” allen wrench
#5 allen wrench
Lubricant (glass cleaner or silicone spray)
Scissors
Masking tape
Needle nose pliers
Marker
Tape measure
Drill
1⁄4” drill bit
Phillips screwdriver
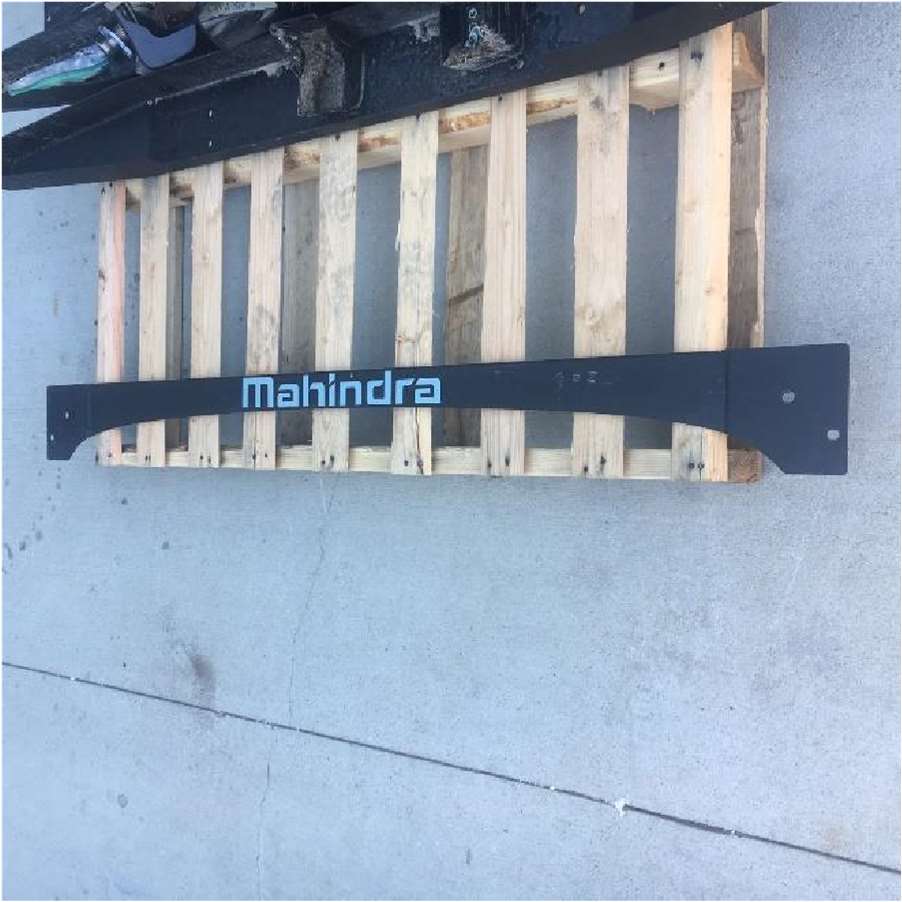
Installing Our On the Rox Windshield Frame is very simple, begin by removing the bottom cowl piece that is labeled with the Mahindra sticker. You may save the factory bolts, or utilize our included 8mm stainless button head bolts to mount our On the Rox Windshield Frame.
Included is approximately 5’ long section of D-shaped seal used to seal the windshield frame to the cowl. This is placed near the top of the cowl between the roll bar mounts.
Also included is a section of larger rubber weatherstrip to go between the windshield frame and roll cage. We recommend applying the adhesive side onto the windshield frame. Account for where your clamps will land, and trim for their location. We also recommend using a heat gun or equivalent on the adhesive in order to get a strong adhesion, as well as leaving the windshield folded up for at against the frame for at least 24 hours to allow the weatherstrip to make good contact.
Position the window frame, while being careful not to drop it on the cowl, locate the bottom of the frame mounting holes where the Mahindra cowl mounted. Bolt it onto the Roxor using either the factory Roxor bolts or our included 8mm SS BH bolts and washers. You will want to line the windshield up with rollbar support. (Having another set of hand during this step is helpful)
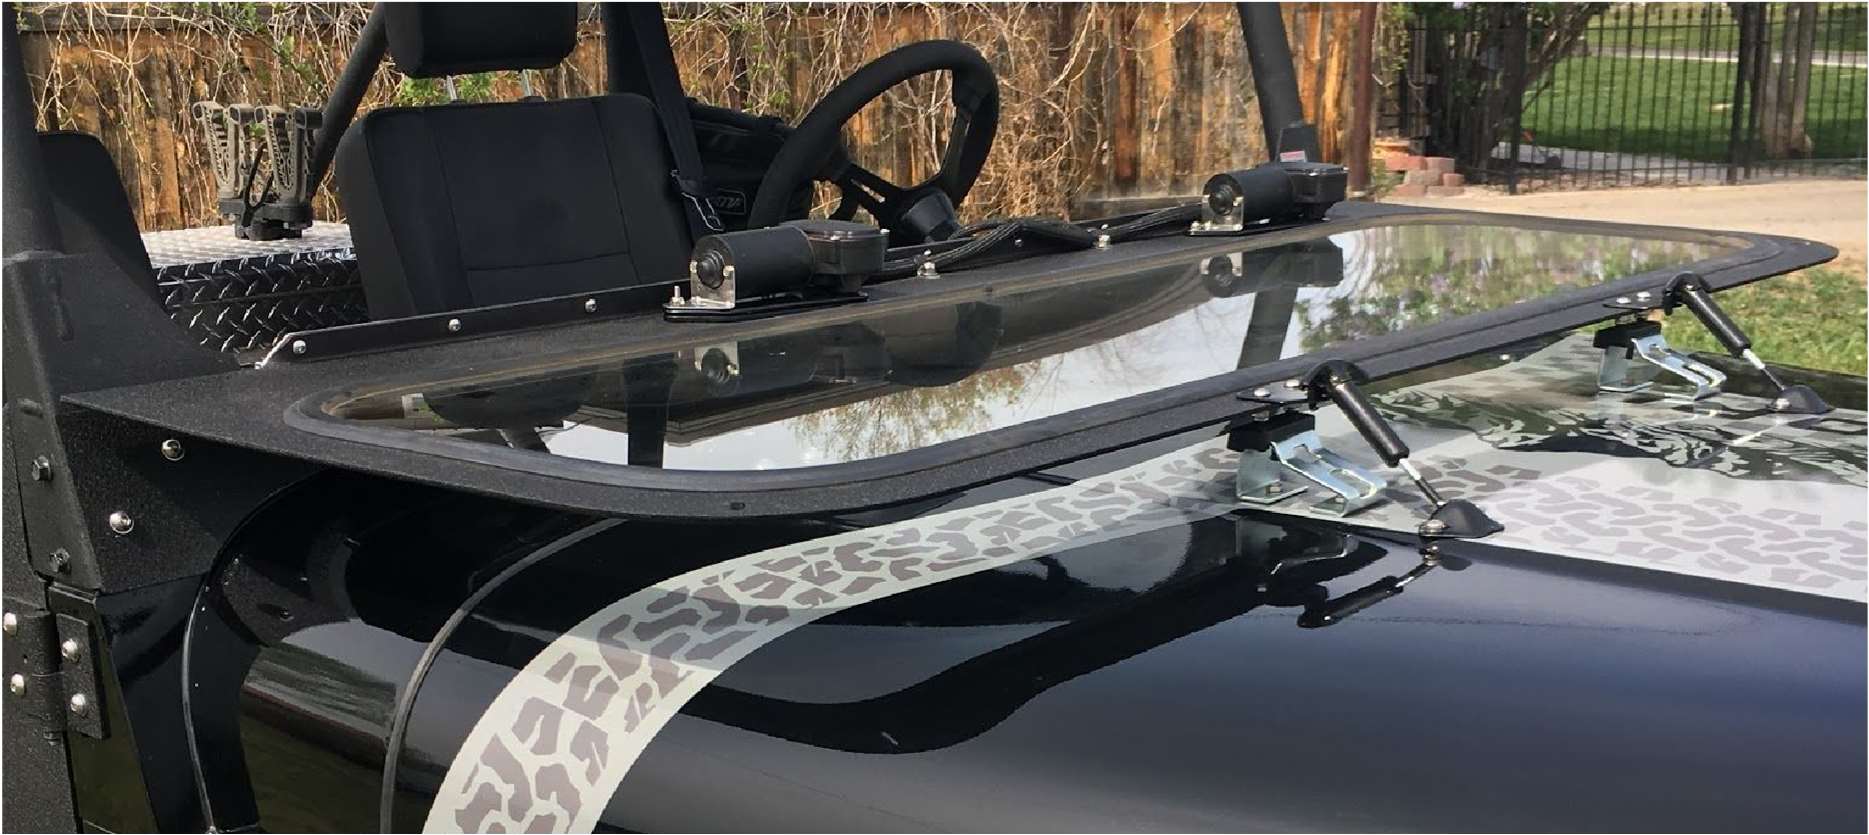
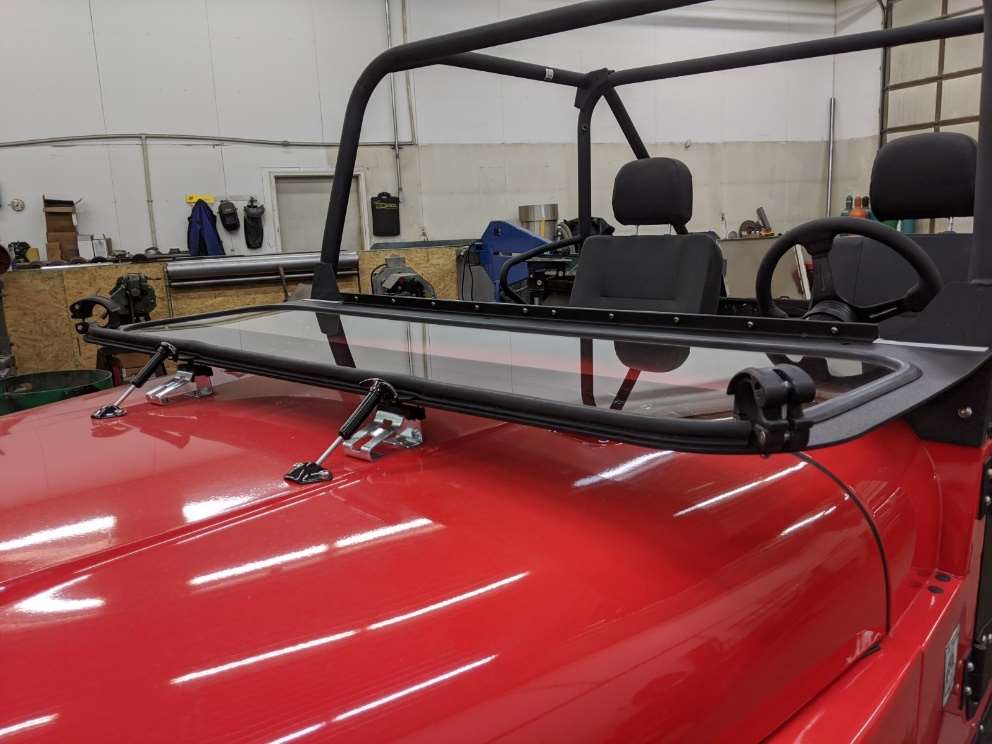
Install the supplied quick release clamps on the windshield frame as shown. (Leave the hardware loose until it is clamped to roll bar, adjust to fit then tighten hardware)
Clamp down at the end (As shown in the third picture)
Take the supplied 5/16-inch stainless bolts and fender washers and mount them through the bottom center holes in the windshield frame that line up with the factory Roxor holes in the cowl to better solidify the mount. Install them with the fender washer and nut inside and under the dash, and the button head on the outside of the frame.
You will also want to install the rubber pad onto the galvanized bracket. Apply lubricant to the tip of the rubber pad, and gently help the tab push through the bracket with a pair of needle nose pliers. If the pads are broken, we can offer replacements. The price is $20.00 a set, so be very gentle and careful with this step.
Next, start with placing tape where the tabs of the windshield will be laying down.
Now, take the bump stops and line them up with the holes in the tabs. They should be parallel to each other.
Mark the holes, once the front one is marked if you have taped wide enough around the bump stop, you can mark the sides and flip it, match the hole to mark the back one.
Now tape down from the hole marks, this is for the hood hook. Measure from center of the hole 3 1/8” down.
Take the hood hook and line it up with the line to mark your holes, the metal will line up to the center line.
• Verify that the bump stops are in the right spots, and that the hood hooks look correct. (they will be a little shorter then where they need to)
• Once all measurements are verified, drill the holes out with a ¼” drill bit.
• MAKE SURE NO OBJECTS IN THE ENGINE BAY WILL BE HIT WITH YOUR DRILL BIT.
Once drilled you can install hardware as shown
If you are using our OTR Wiper Assembly Kit with our folding windshield frame, you will need to utilize the included spacers. If you aren’t using our wiper kit, put the hole plugs in.
If you aren’t putting in our wiper harness you can plug the smaller holes with the # 10 supplied bolt and nut, or use a little bit of black RTV. (green arrow)
The Drivers side and passenger side wiper motor will require two spacers.
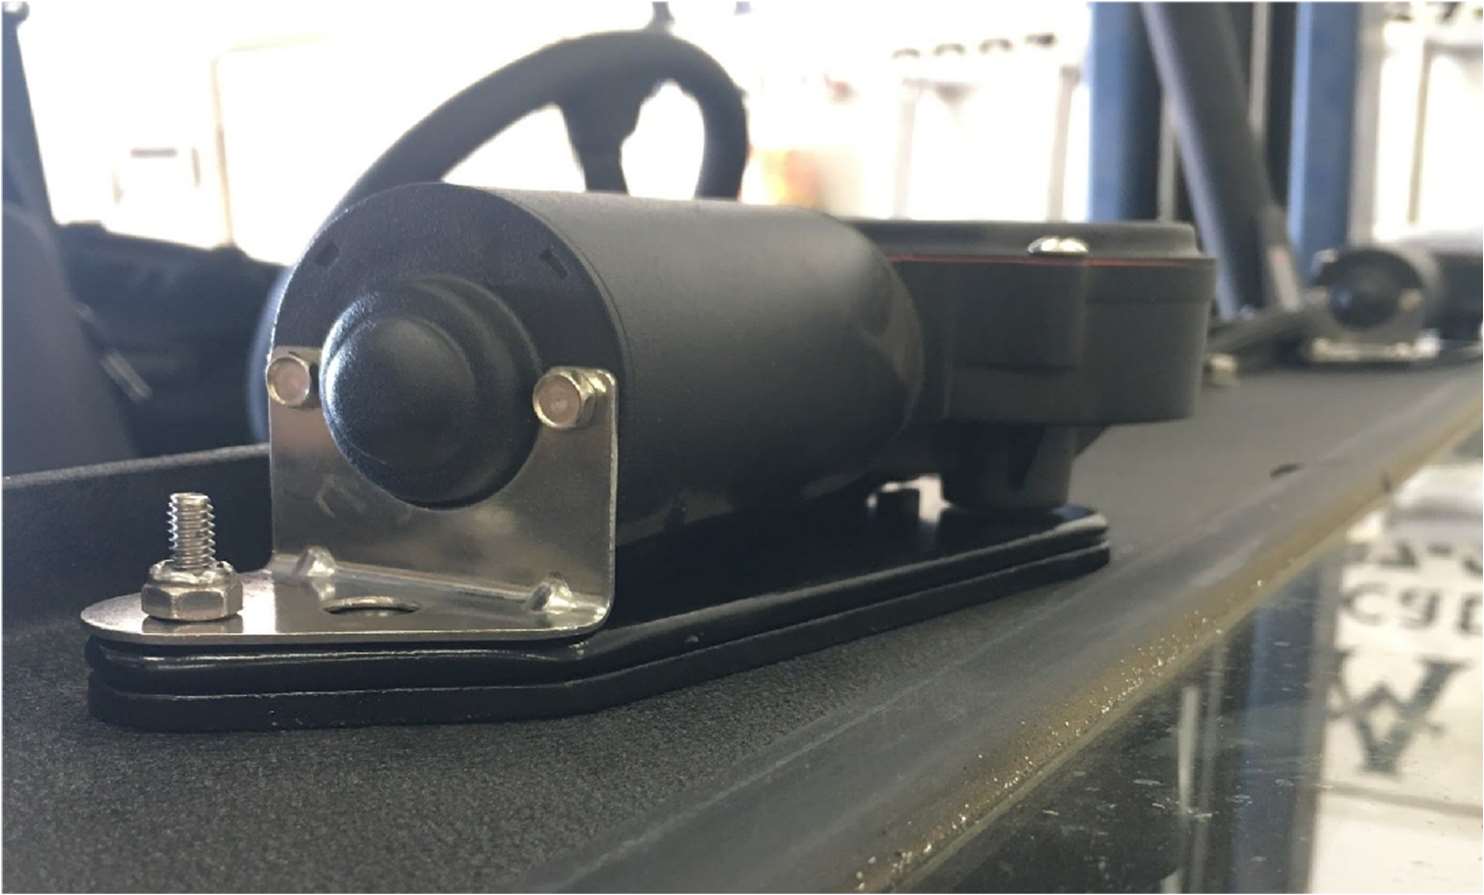
Install the wiper motors as noted in the wiper motor installation guide, but include these spacers as shown between the motor and the frame. (Passenger side will need the included longer #10 SS BH Machine Screw.)
Make sure to keep wiper motor wiring harness out of the way of the hinge closing and opening.
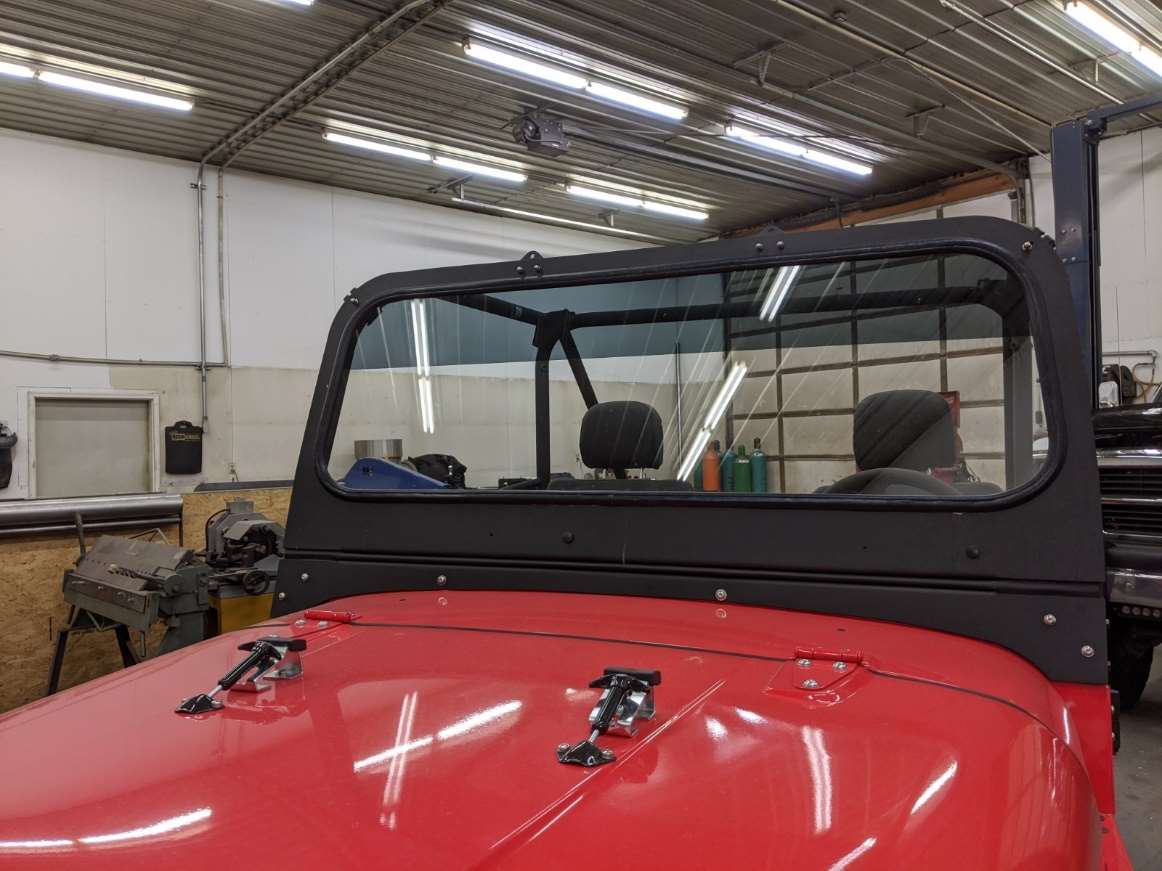
So Fresh, So Clean!
Now if you’re a more of numbers person, and need all the details you may follow the next steps instead
Next, begin by measuring and finding the center of the hood. Do not use the hinges as their mounting location may vary. Use a body line on the hood.
Use masking tape to mark the center, and the upcoming measurements as you make them. (If your measurements vary from ours that is alright. Just make sure that the mounting locations are symmetrical.) (Also, verify that the T Handle hook will grab onto the catch tab.
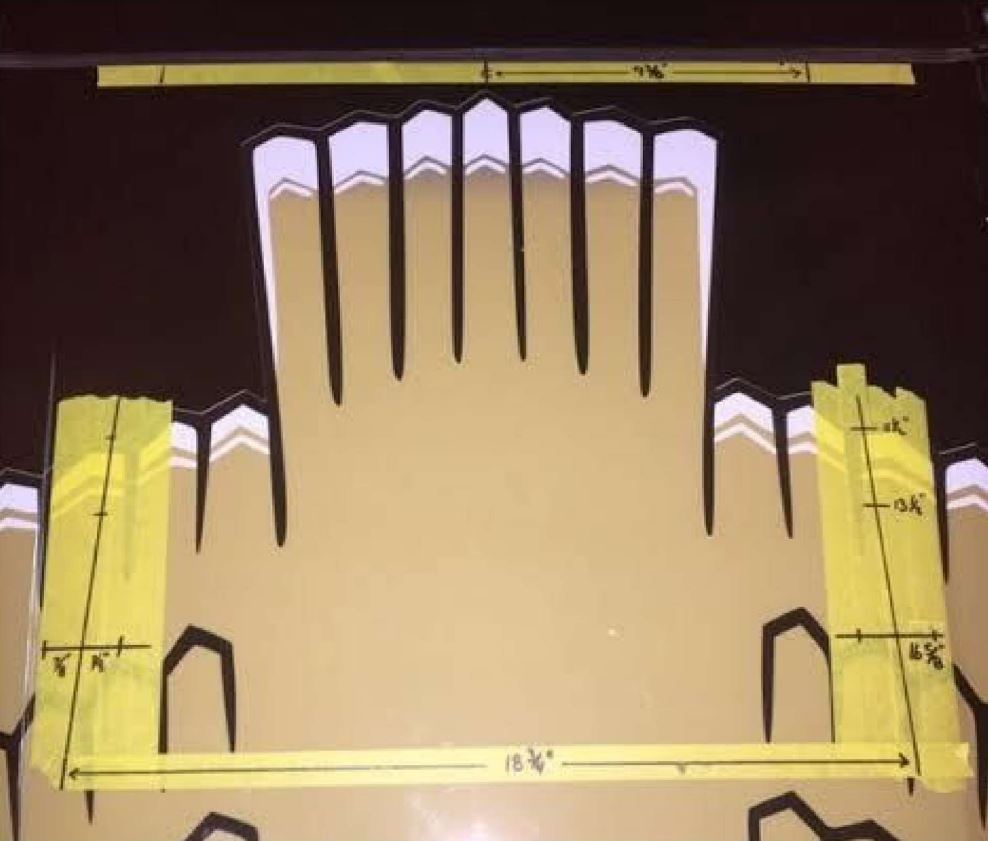
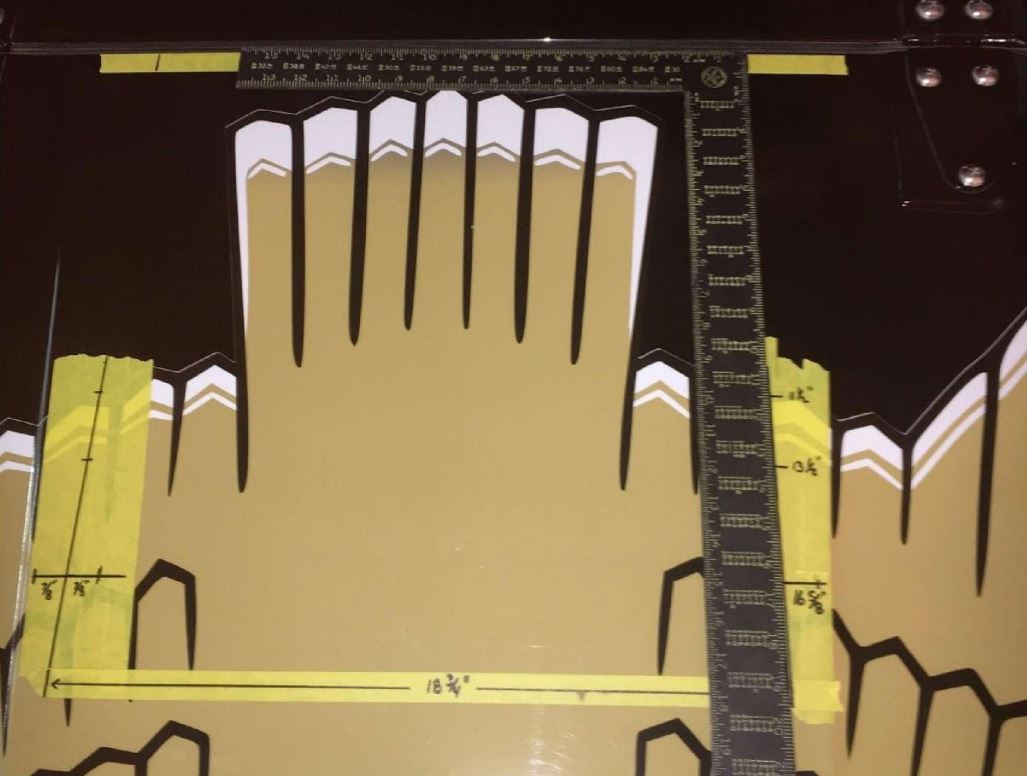
From the center, mark 9 3/8” outwards on both sides.
Use a framing square to map and mark out the rest of the holes as shown below. Make sure to align the framing square with the back edge of the hood (not the cowl) and use the back edge of the hood for reference as you mark out the remaining holes.
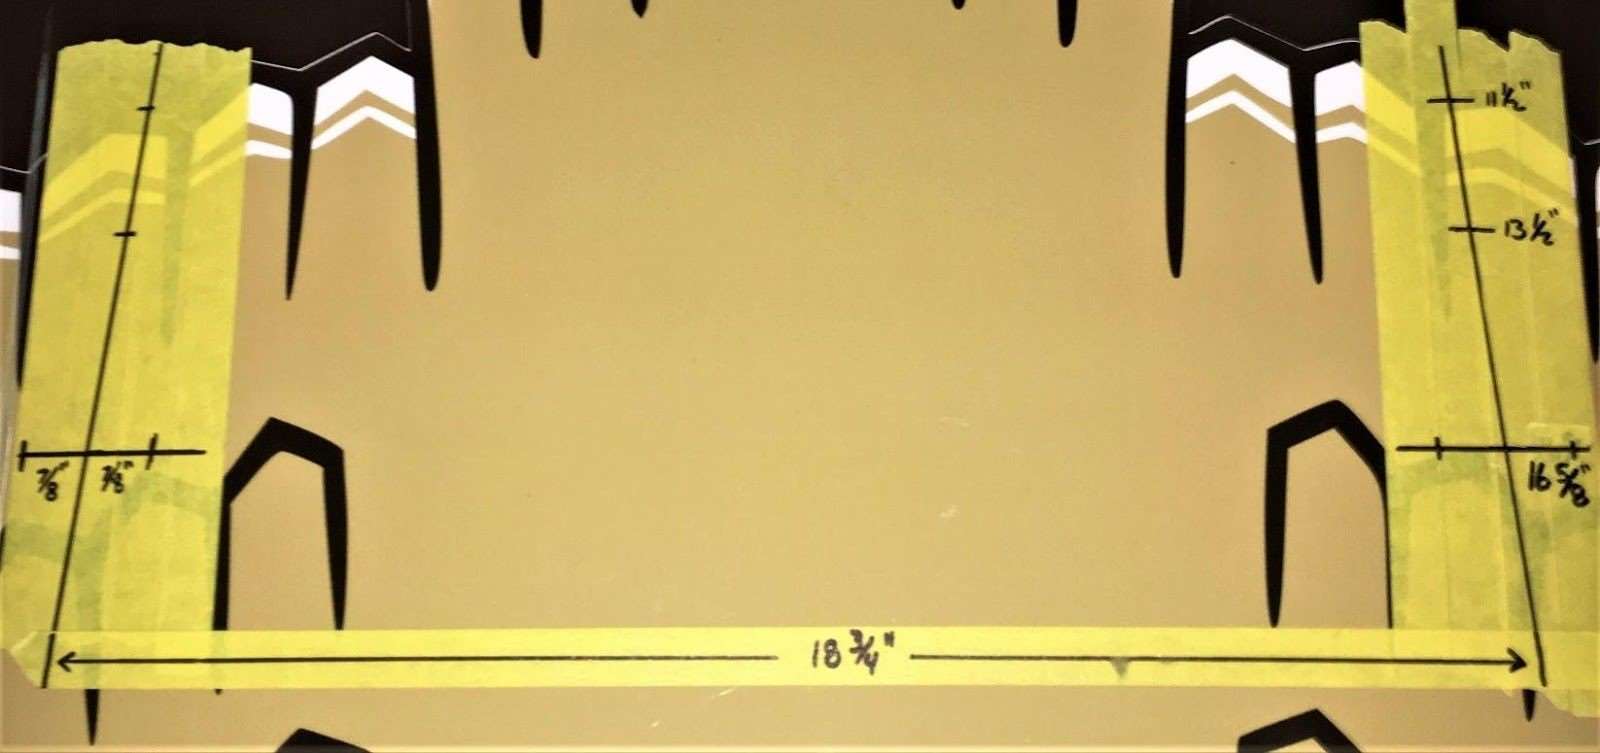
Mark the next holes out at 11 1/2”, 13 5/8” and make a perpendicular mark at 16 5/8”.
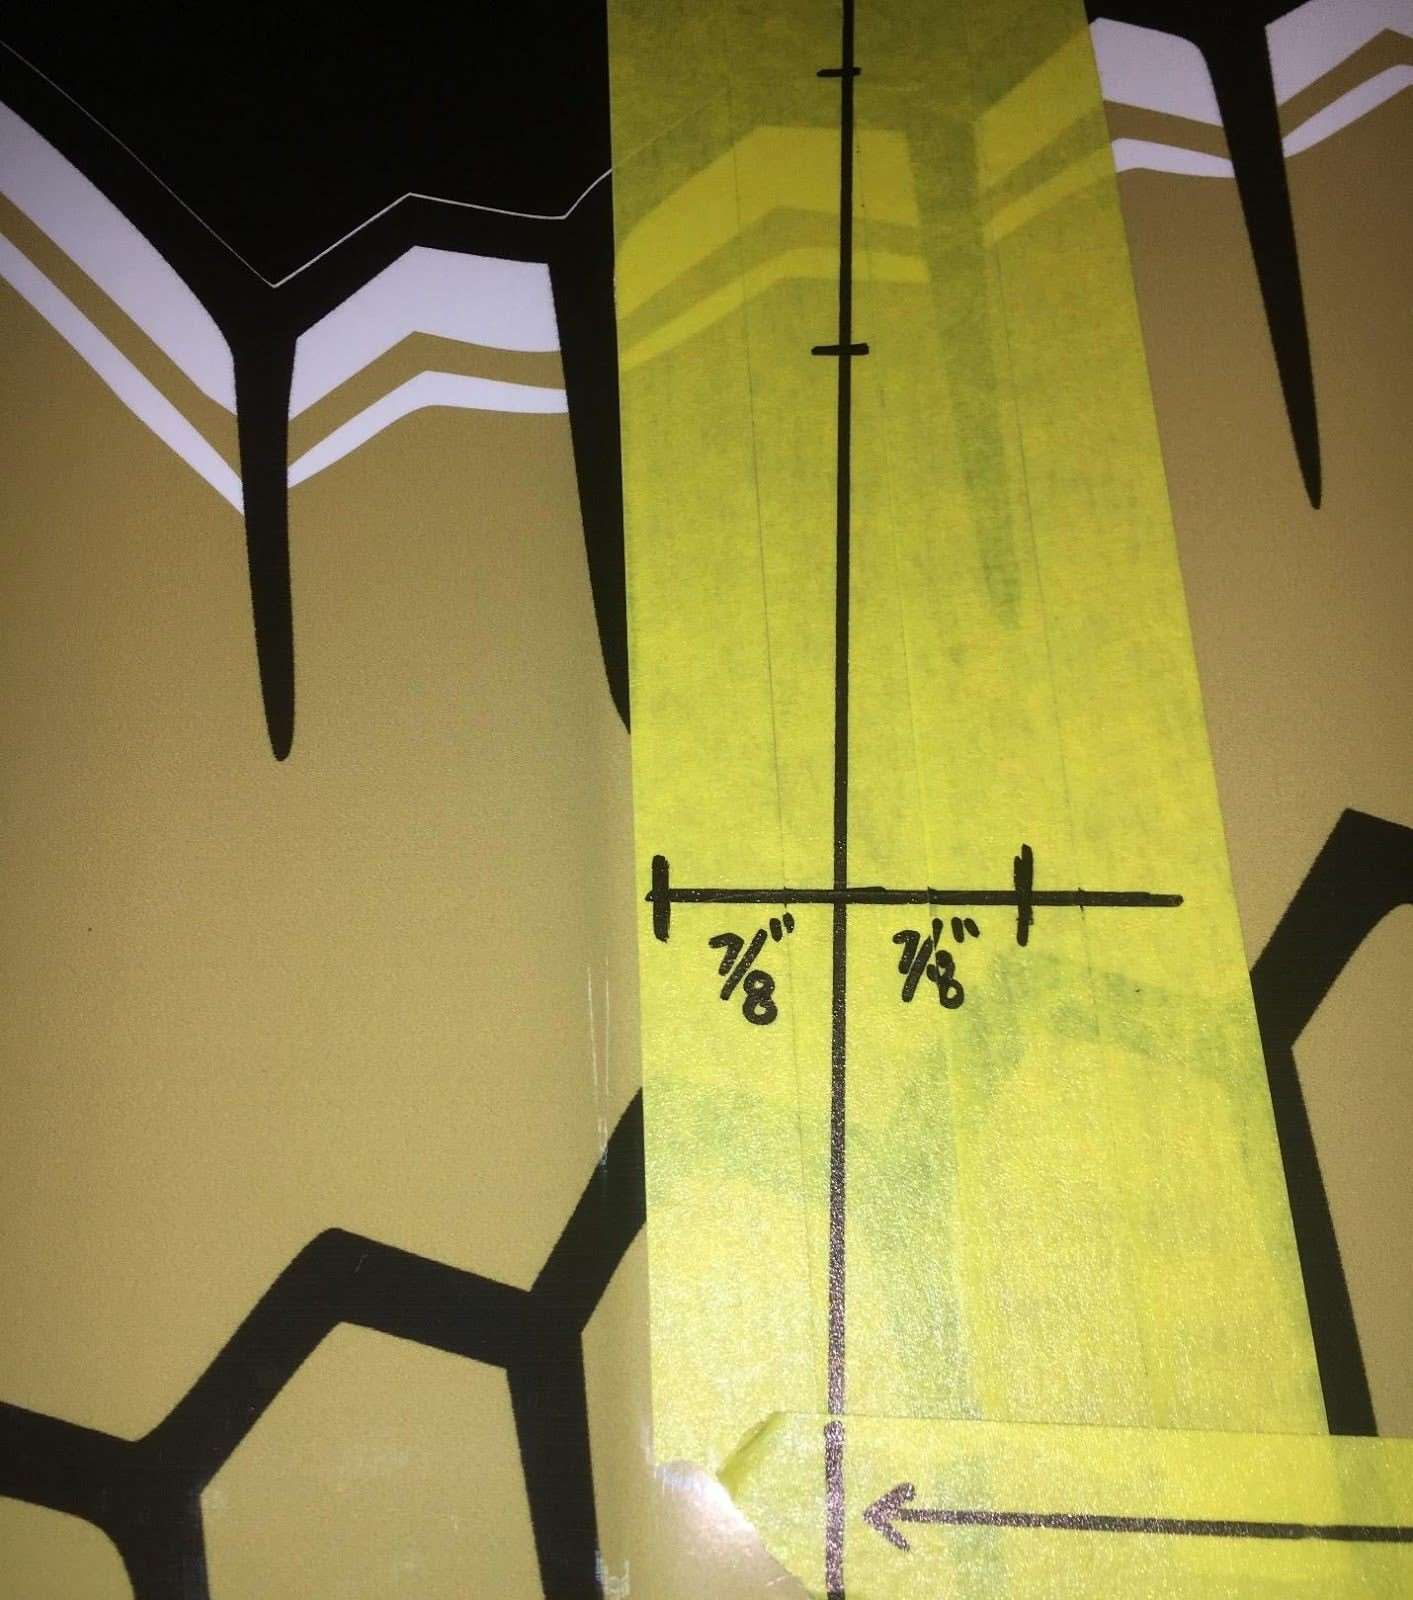
At 16 5/8” you will mark for two holes 7/8” on each side of the vertical line, on your perpendicular line as shown below.
Your layout of measurements and holes to drill should look the same as below.
Verify that your hole sets are 18 ¾” apart.
Verify that the windshield catch tab lands in the correct spot to be securely fastened when the windshield frame is folded down, if it doesn’t please adjust your measurements.
Once all measurements are verified, drill the holes out with a ¼” drill bit. MAKE SURE NO OBJECTS IN THE ENGINE BAY WILL BE HIT WITH YOUR DRILL BIT.


