*READ INSTRUCTIONS THOROUGHLY BEFORE BEGINNING. OTR IS NOT RESPONSIBLE FOR INCORRECT INSTALLATION OR LOCAL LAWS REGARDING AFTERMARKET ACCESSORIES. THE USER IS RESPONSIBLE FOR ALL LIABILITIES ASSOCIATED WITH THE INSTALLATION AND USE OF THIS PRODUCT.
ALWAYS UTILIZE PERSONAL SAFETY EQUIPMENT WHEN YOU ARE WORKING IN THE SHOP.
DISCONNECT BATTERY BEFORE YOU BEGIN.
Remove the hood hold down, side marker lights, headlights and the grille.
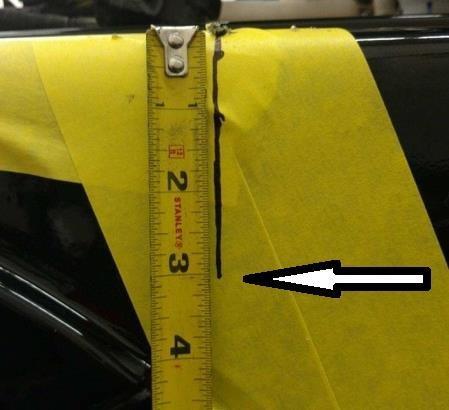
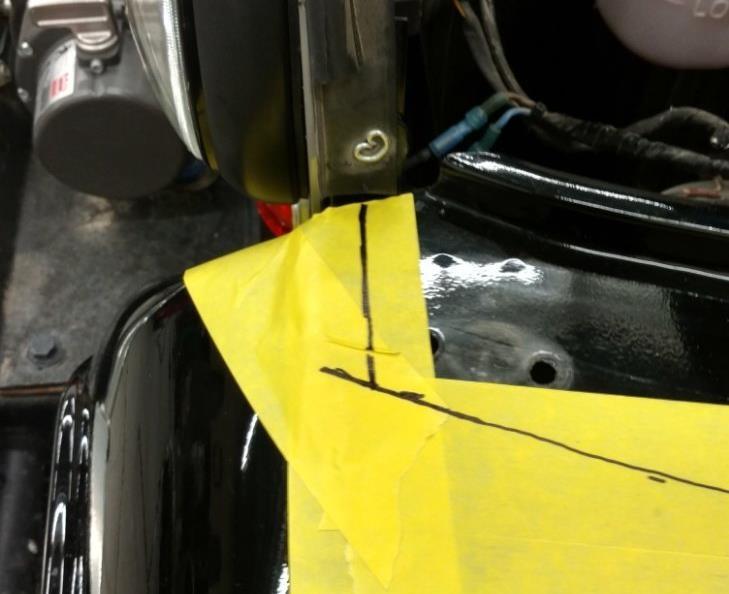
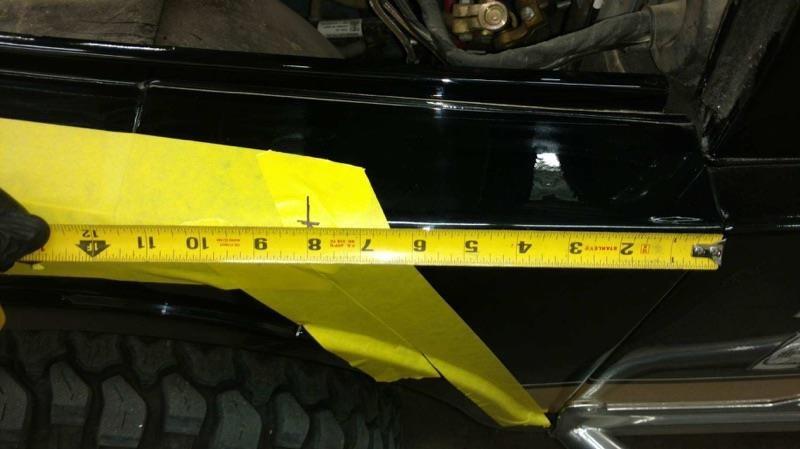
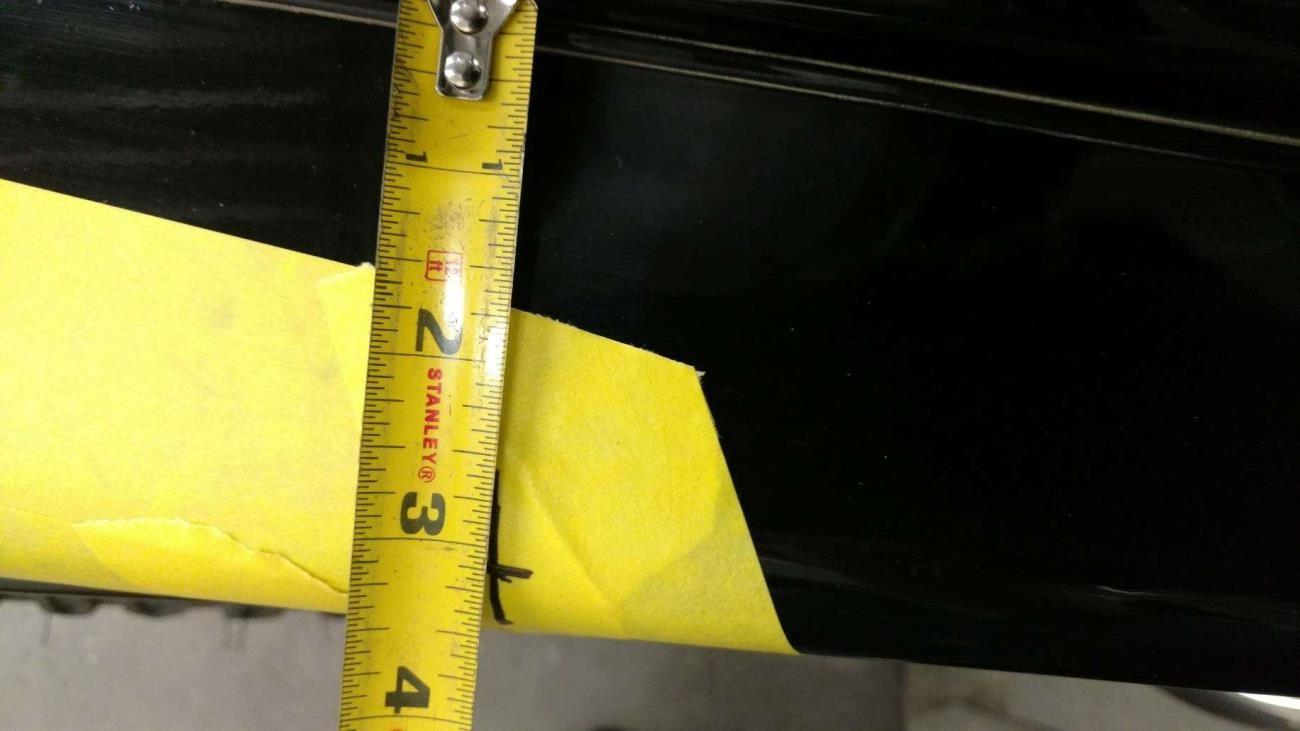
Measure 8” forward from the back edge of the fender, and 3 ¼” from the top fender flange. At the intersection, drill a 1/4” hole.
From the hole, draw a line straight down approximately 3”. This will intersect with the next step.
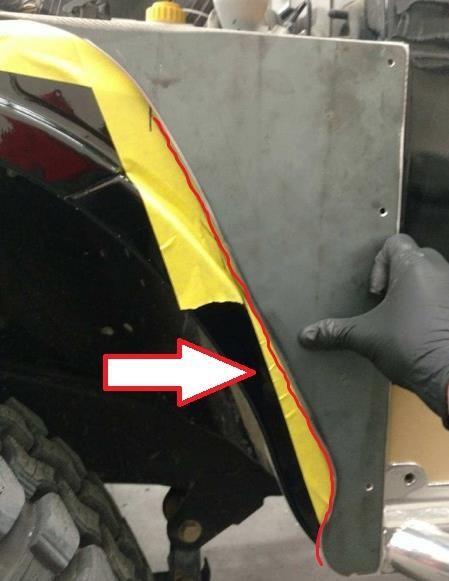
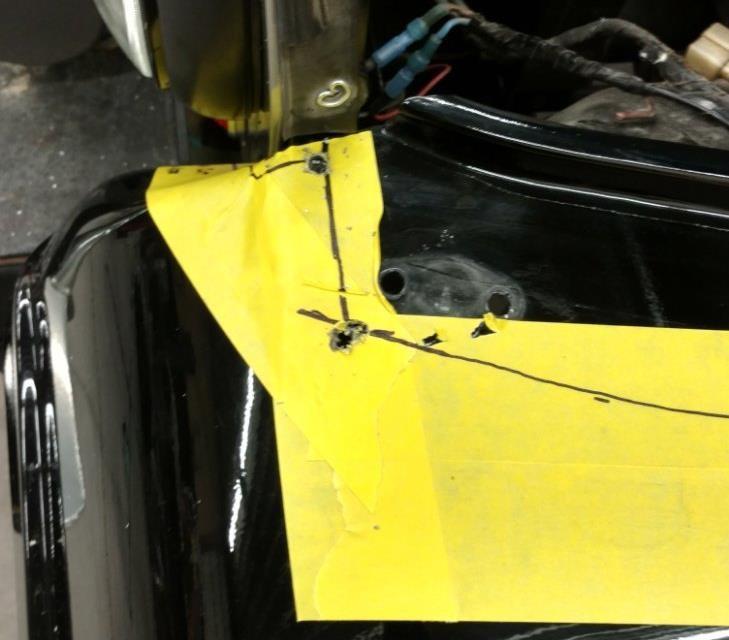
Using the side plate as a pattern, line the plate up with the back edge of the fender then trace down to the fender lip, then follow that to the bottom of the fender.
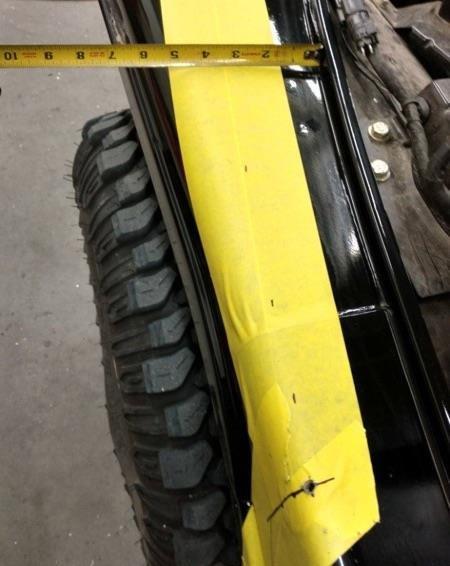
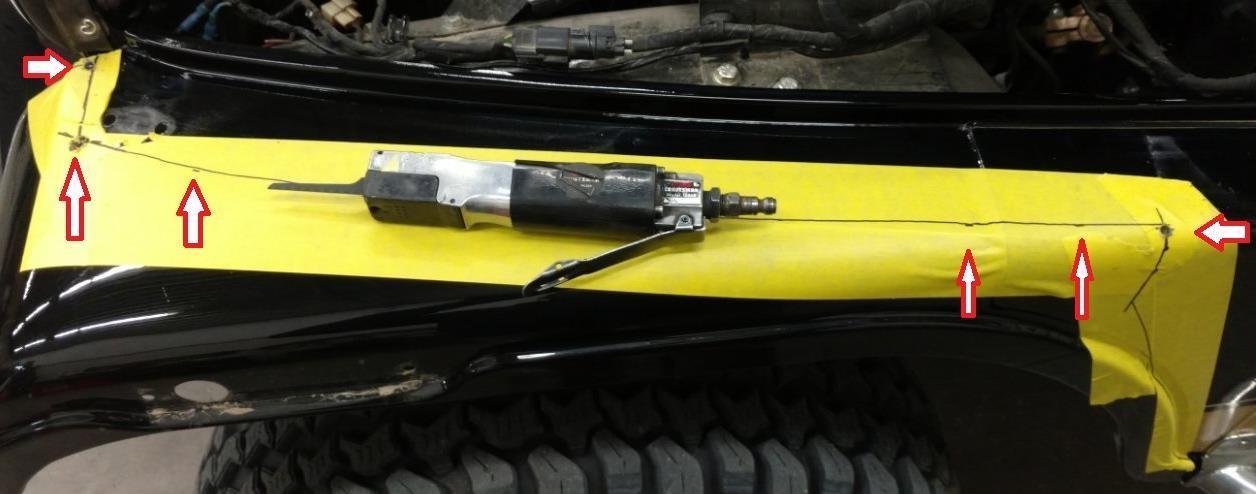
Following the top flange on the fender, measure and mark a series of lines 3” outward from the flanges and connect the lines.
Mark Parallel with the grille for “Rough Cut” to be trimmed closer after the excess is removed.
Mark the top of the fender roughly as shown below close to the center of the grille and support.
You may drill a couple of holes to cut between with a body saw along the fender lines.
Make your cut along the lines you laid out
Trim the remaining part of the fender that hangs out past the grille. Stay just on the outside of the factory seam towards the front.
Once excess material has been removed, clean and debur the sharp edge.
Fit the side plate up with some temporary zip screws onto the side of the fender. (You will need to drill ¼” holes using the side and top plates as a template when you complete the final mounting step.)
Fit the top piece with some temporary zip screws. You will need to drill ¼” holes for the mounting bolts after you have fit and welded everything up.
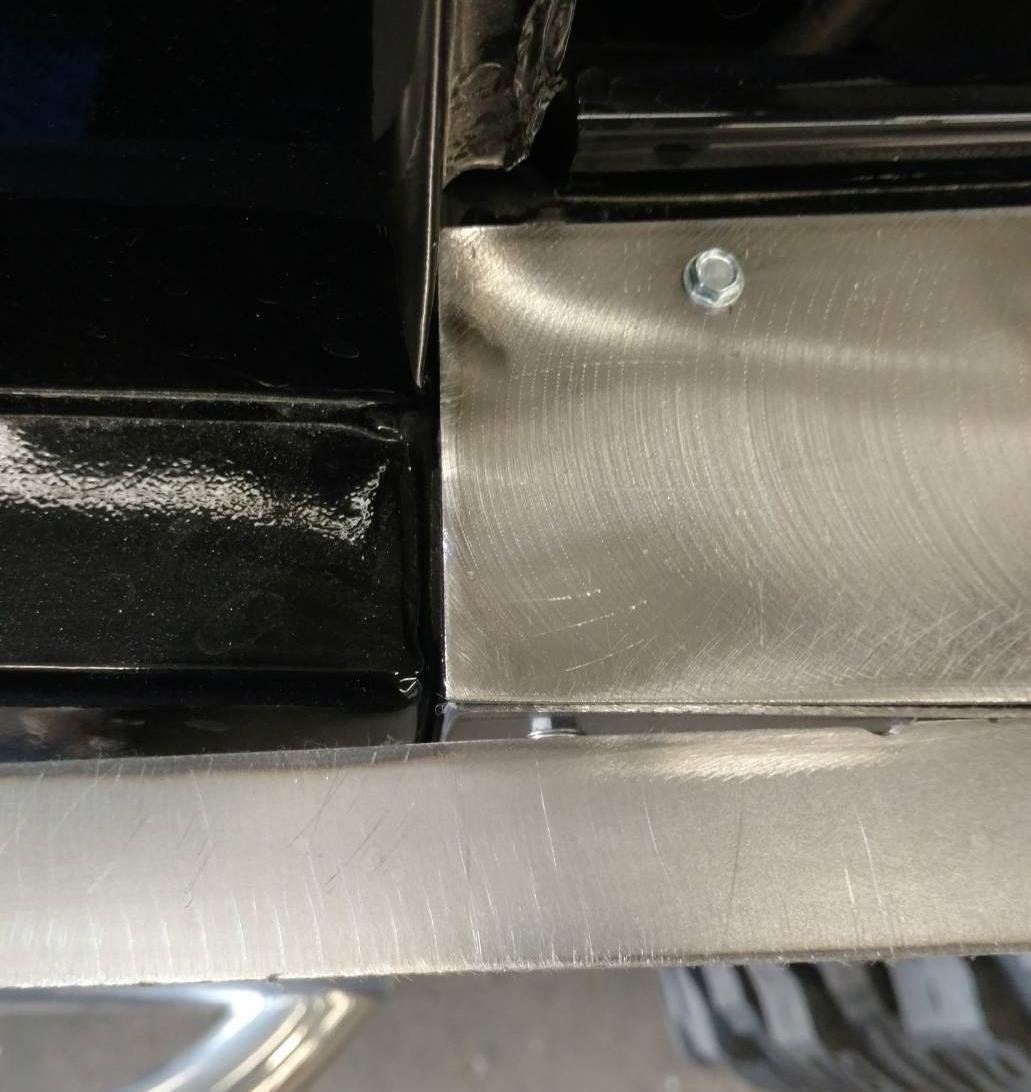
You can begin to tack the top plate to the bottom plate once they are fit up and in the correct position. (If you do not want a weld to be visible on the top, tack weld the plates together on the inside.)
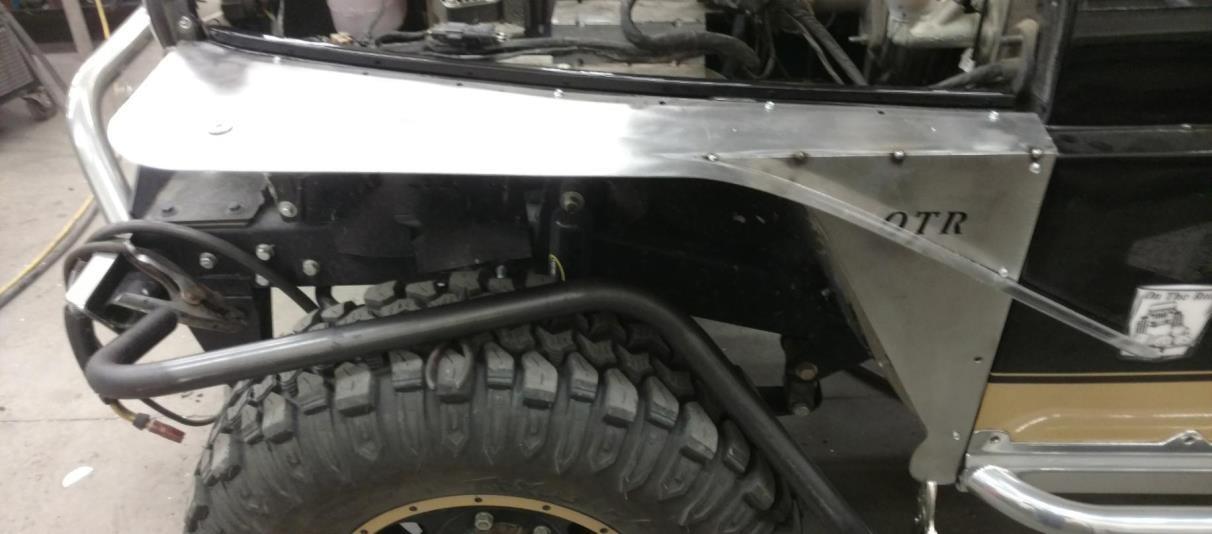
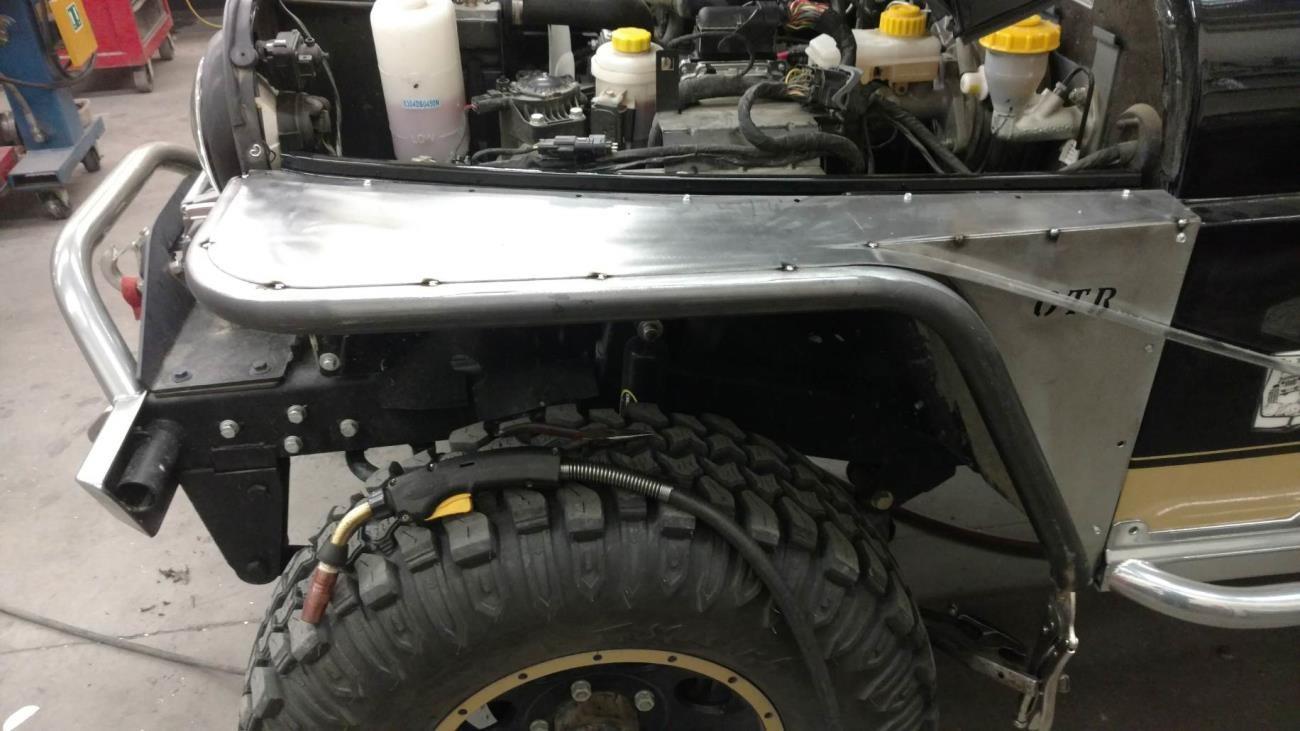
Once the top and side plates have been trimmed where necessary, fit up and tacked together as shown, you can begin to fit-up the tube.
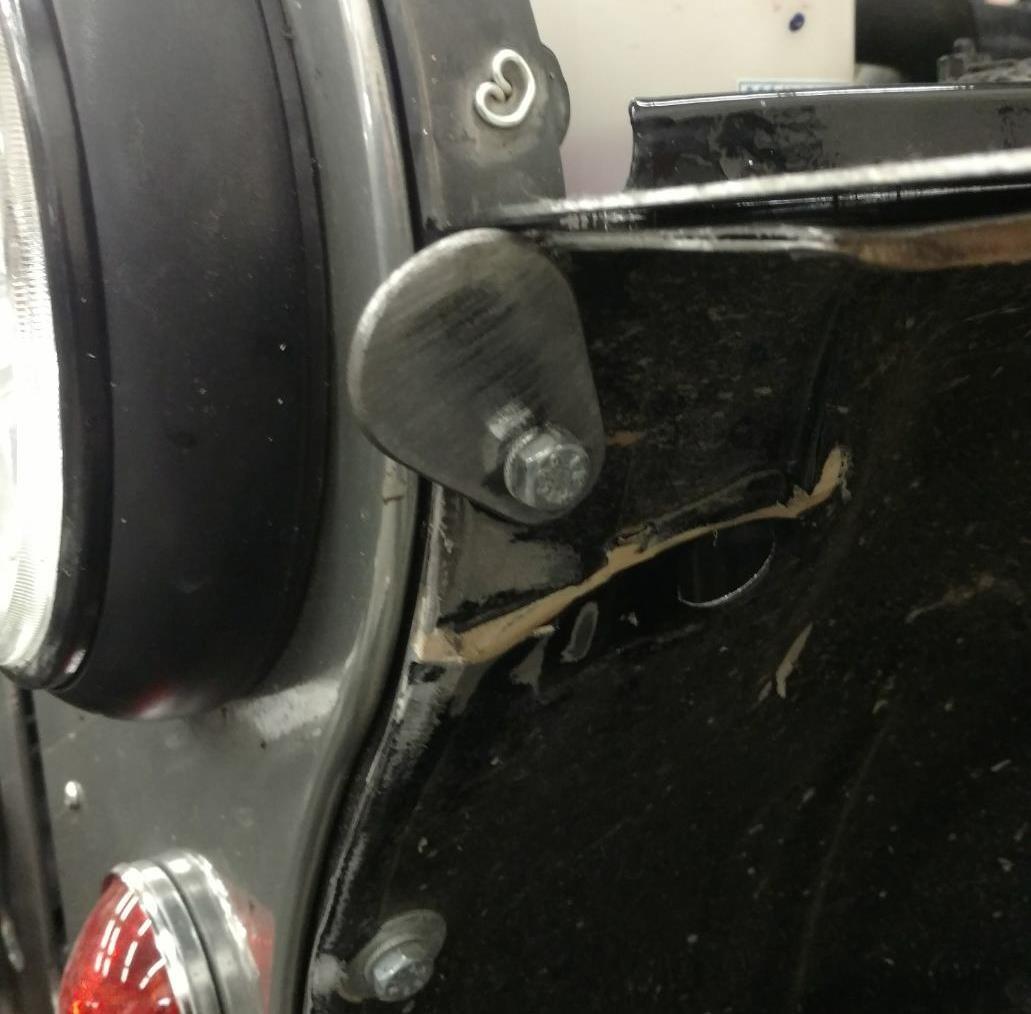
Start by bolting on the supplied tab as shown. You may have to adjust it a bit, as you begin the tubing fit-up.
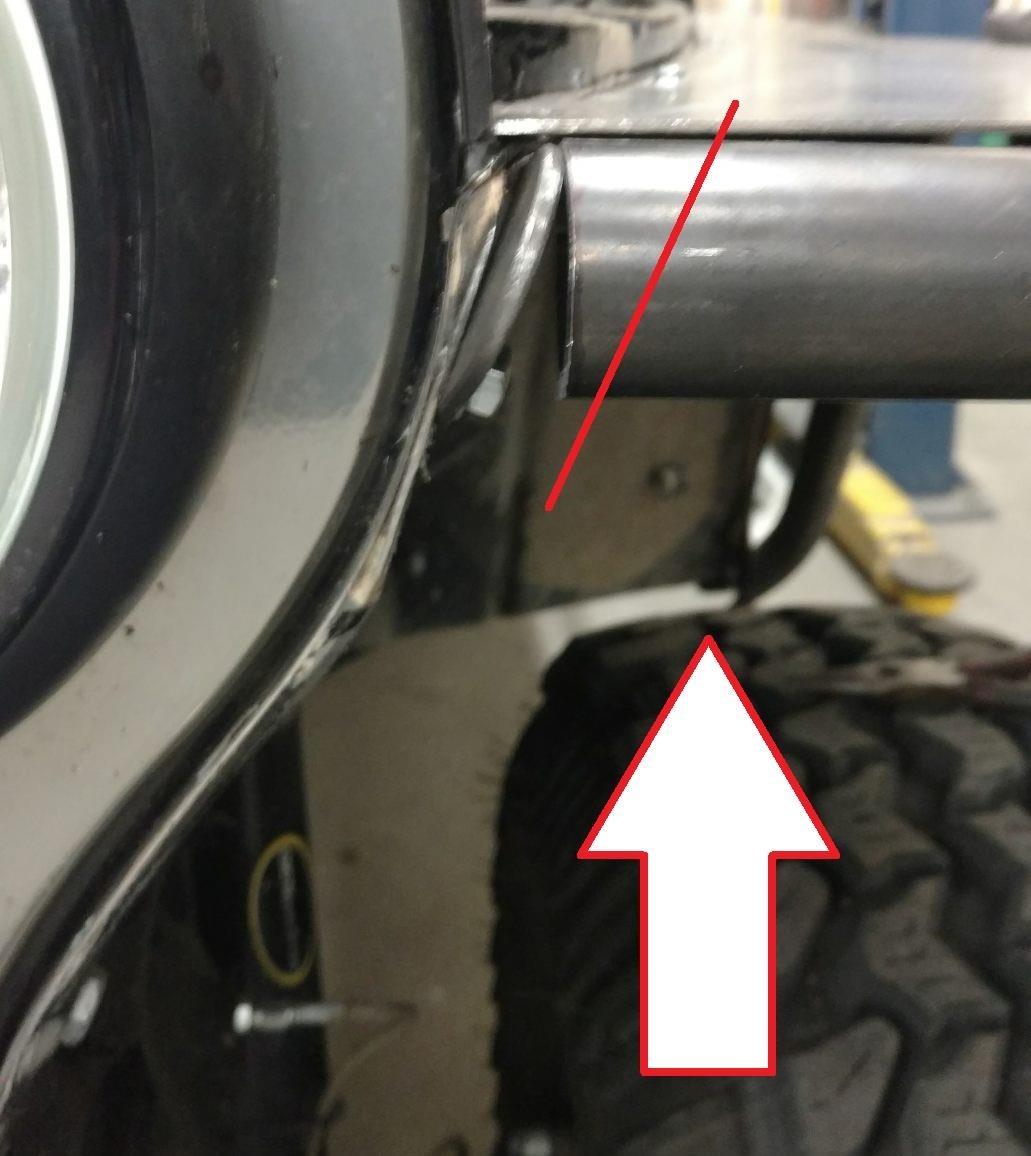
Clamp the tubing to the fender by the footwell area, so that it is loosely in place as you fit-up the mounting tab.
Trim the tubing to fit onto the tab as shown below, while fitting and lining up the tube with the rest of the top plate. Once fit-up, tack the tubing in place
Start forming the rear piece of the top plate to the rear of the tubing, and down to the bottom of the side plate. Tack this piece in place as you fit-up and form it to the arch of the tube.
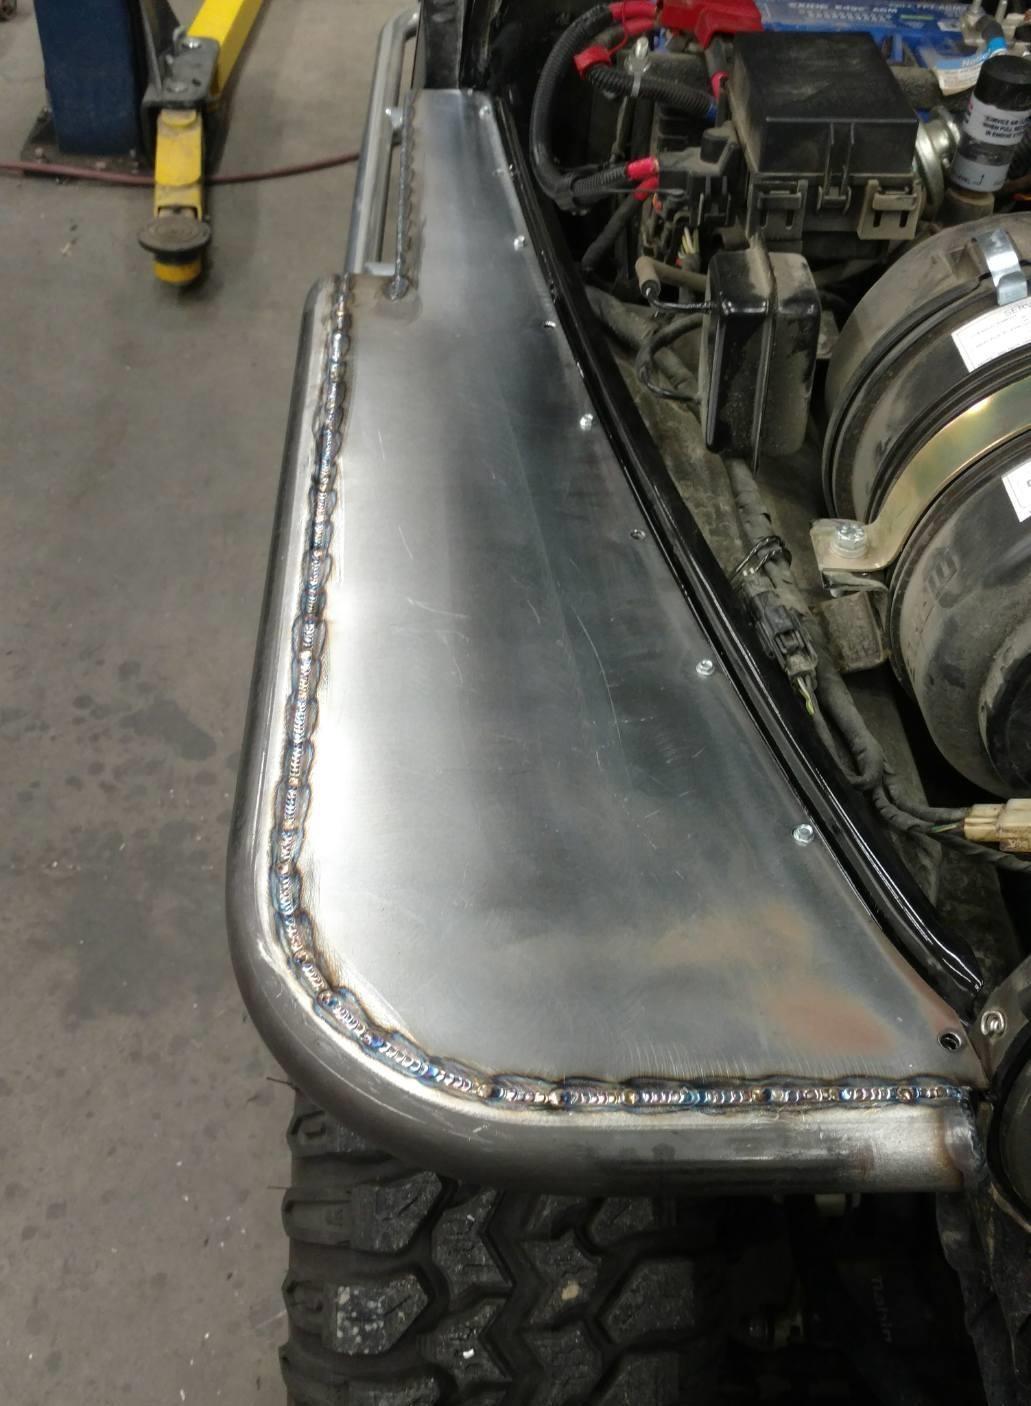
Once you have each side fit-up and tack welded, you can remove them for final welding and metal finishing. If a weld is not desired on the top visible side of the fender, you can tack together and stich weld the inside of the tubing and plates together. Seam seal the top side.
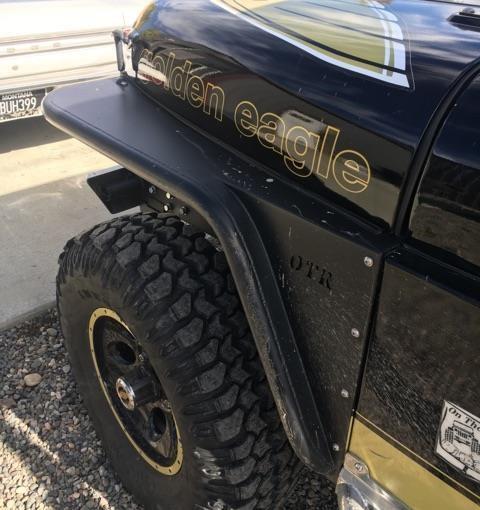
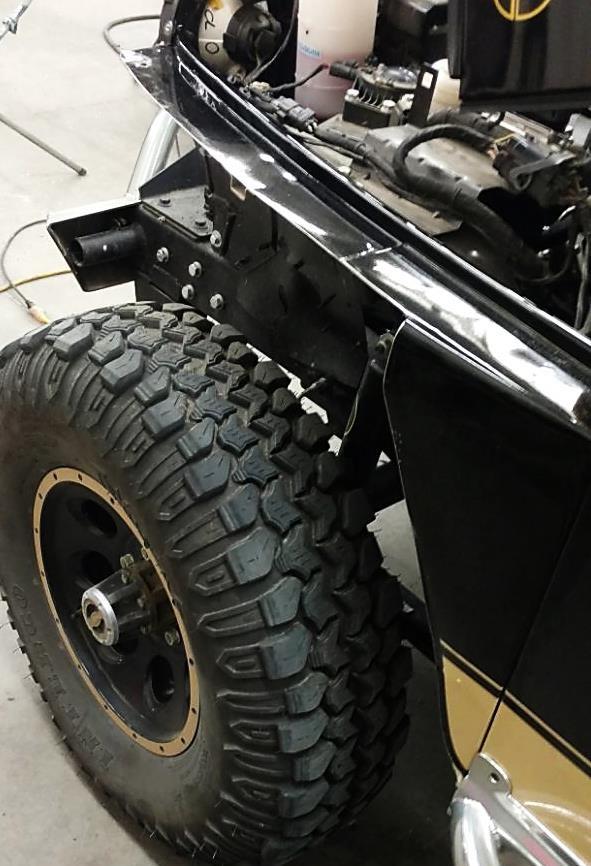
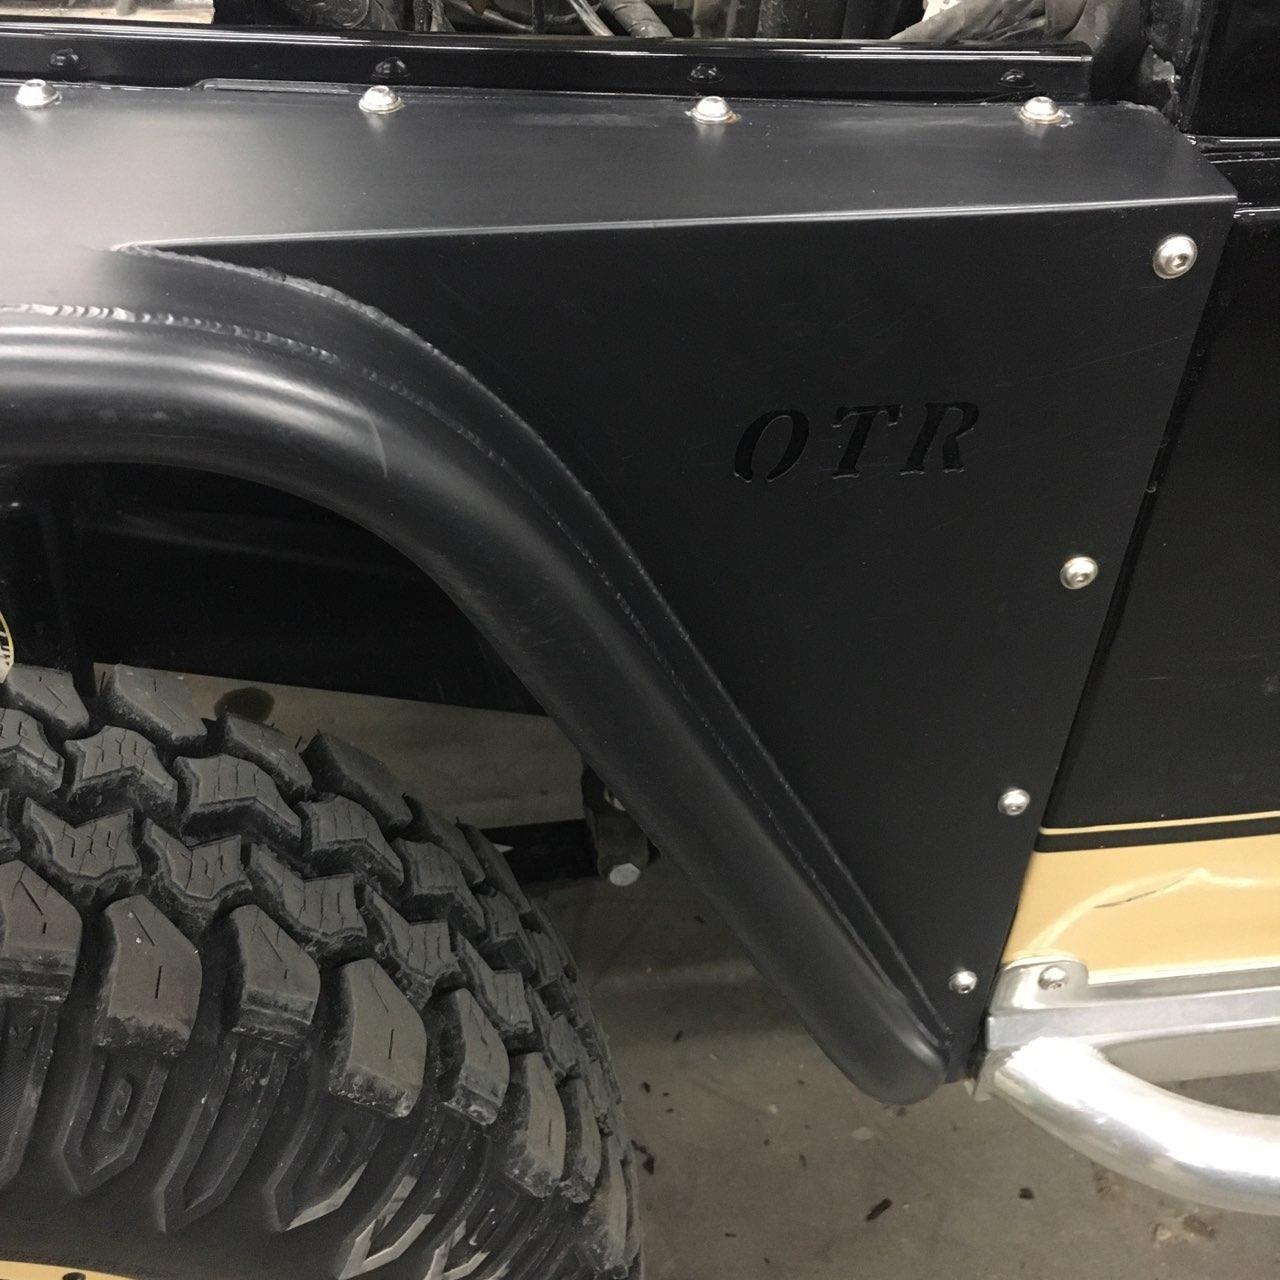
Once you have the fenders fully welded, any edges de-burred and metal finished, you are ready to have them painted or powder coated.
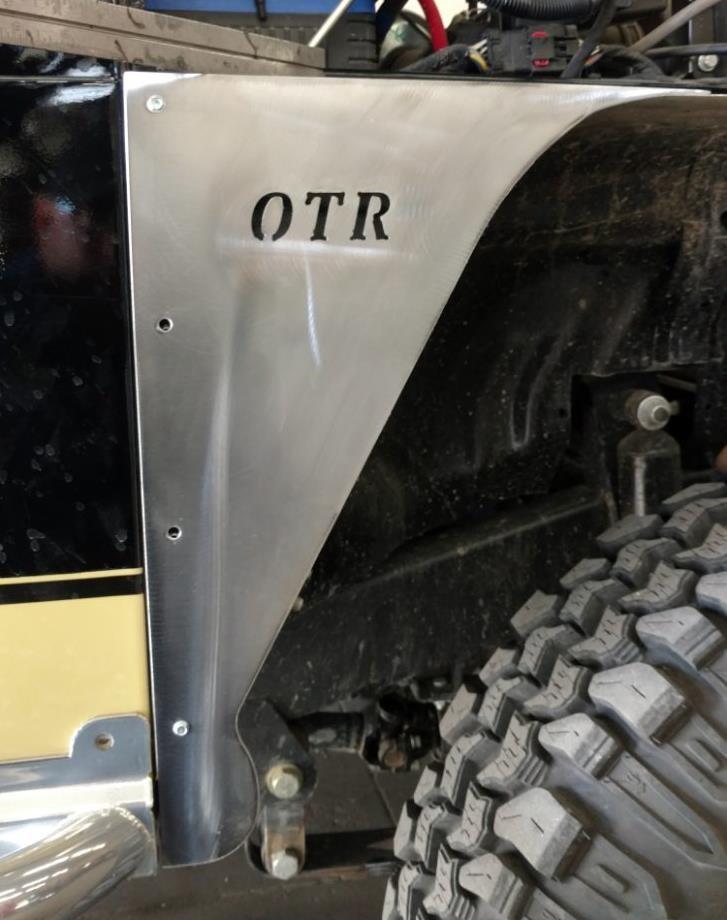
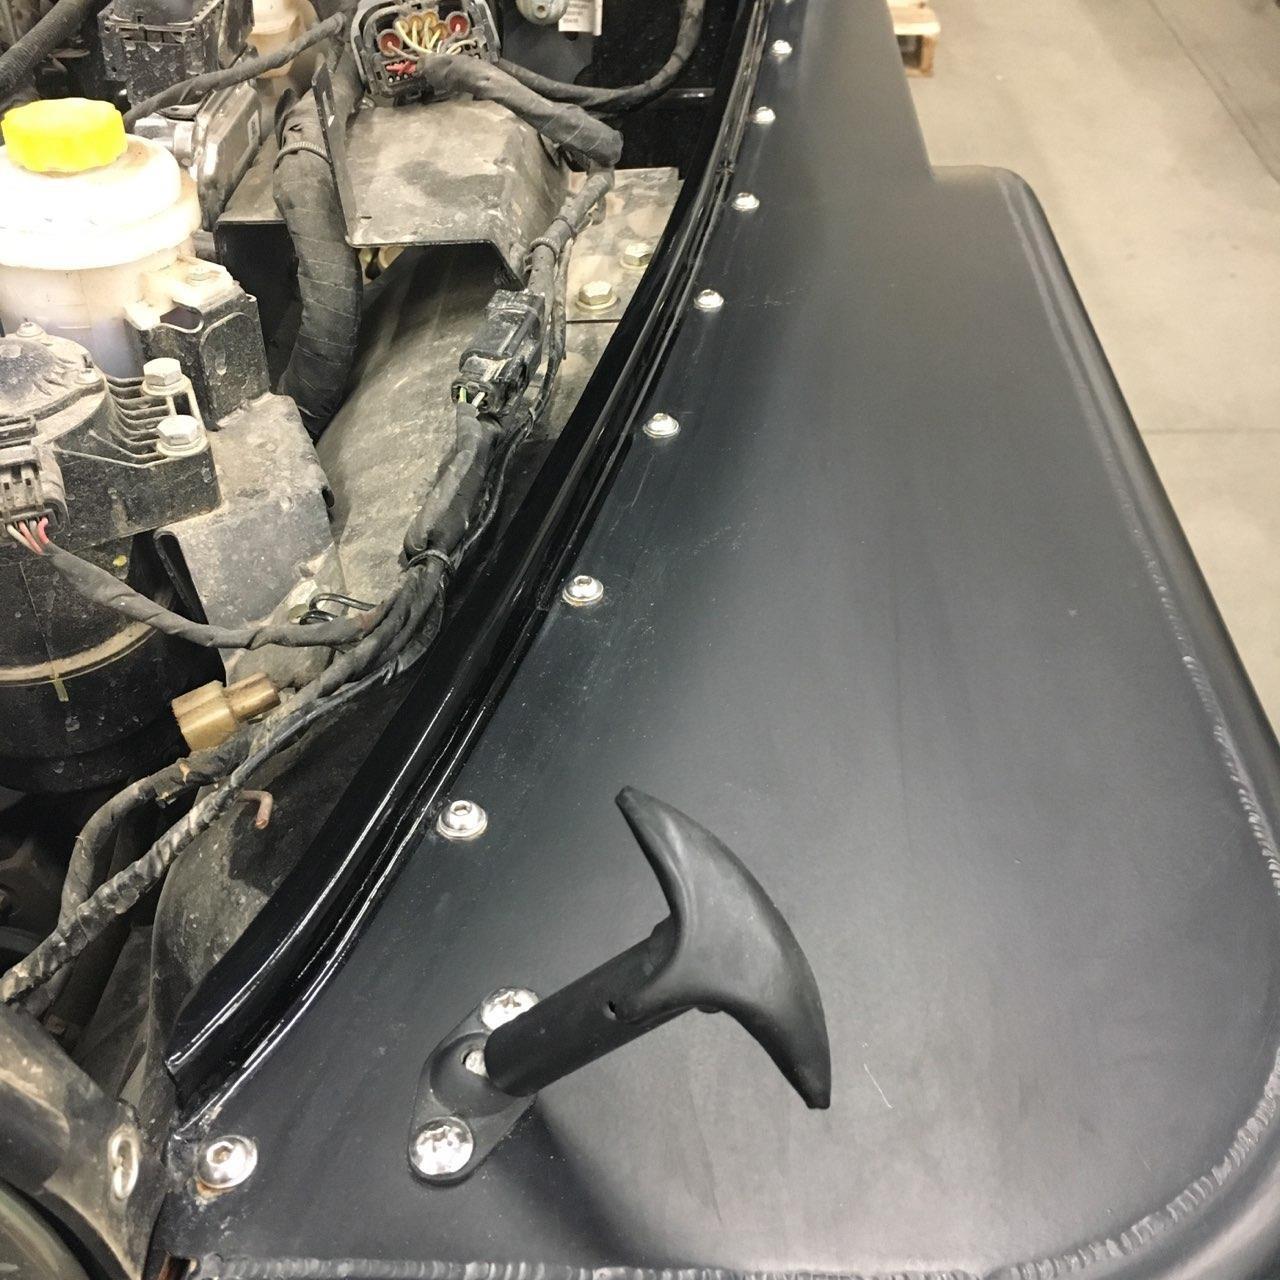
When you are reinstalling the fenders, use the supplied ¼” bolts and nuts to reinstall. You will need to use the fenders as a guiding template to drill mounting holes into the existing original fender material to install. Remount the factory hood hold downs.
The tube fenders will not sit flush with the body. If you want to adjust them flush, you will need to notch the 4 OE fender mounting holes located inside the fender, perpendicular to the 4 tube fender bolts along the back edge. The top 2 bolt holes will be notched on a diagonal “up and out” on the fender. The bottom 2 bolt holes will be notched on a diagonal “in and down” on the body.


